How to Make Cold Brew Coffee: A Q Grader's Complete Guide
CQI Q Grader and SCA roaster Clara Bennett explains how to make cold brew coffee at home — the ratio by weight, grind, steep time, filtering, and the extraction science behind why cold brew tastes smooth and low-acid.
Updated
I make a lot of coffee for a living. As a Q Grader I taste through dozens of coffees a week at the cupping table, scoring them on acidity, body, sweetness, and balance — and yet the brewer I reach for most on a hot afternoon is the least fussy one I own: a jar of cold brew steeping on the counter. There’s a reason cold brew has gone from a specialty-shop curiosity to something half the people I know make at home. It is genuinely hard to mess up, it forgives beans that are a little past their prime, and it produces a cup that is smoother, sweeter, and gentler on the stomach than almost anything you can brew hot.
But “hard to mess up” is not the same as “impossible to improve.” Most of the cold brew recipes floating around the internet are written by food bloggers, not coffee people, and they stop at “add coffee, add water, wait.” That gets you cold brew. It does not get you good cold brew — the kind with real depth and sweetness instead of a thin, flat, slightly bitter brown liquid. This guide is the version I’d give a friend who wants to understand not just the steps but why each one matters, so they can dial the method to their own taste. We’ll cover the ratio, the grind, the steep, the filter, and the small handful of things that actually separate a forgettable batch from one you look forward to all morning.
What You’ll Need
Cold brew’s great virtue is that it asks almost nothing of your equipment. You can make excellent cold brew with a mason jar and a kitchen sieve. That said, a few tools meaningfully raise the ceiling:
- A grinder. This is the single most impactful upgrade. Cold brew demands a coarse, even grind, and only a burr grinder produces that — blade grinders create a chaotic mix of dust and boulders that leads to a cloudy, over-and-under-extracted cup. If you’re buying one piece of gear, make it a quality burr grinder.
- A scale. Cold brew lives or dies by its ratio, and ratios only make sense by weight. An inexpensive coffee scale that reads to one gram takes the guesswork out and makes every batch repeatable.
- A vessel. Any large glass jar works. A dedicated cold brew maker with a built-in filter basket simply makes the straining step cleaner and is worth it if you brew weekly. A French press doubles as a serviceable cold brew rig, using its plunger as a coarse first-stage filter.
- Filtration. A fine-mesh strainer plus either a paper filter, a cheesecloth, or a clean cotton cloth for the second pass. This two-stage approach is what gives you a clear, sediment-free cup.
- The coffee itself. More on this below, but start with fresh whole bean coffee in a medium to medium-dark roast.
That’s the whole kit. No kettle, no thermometer, no timer precision — cold brew is the most equipment-tolerant method in all of coffee.
The Ratio: The One Number That Matters Most
If you take nothing else from this guide, take this: weigh your coffee and your water. Cold brew strength is governed almost entirely by the ratio of coffee to water, and that ratio only holds steady if you’re working in grams. If you brew hot coffee too, our free coffee ratio calculator does the same coffee-to-water math for a French press, pour over, drip, AeroPress, or Moka pot — enter your water and it gives you the grams of coffee to weigh out.
Here is why scoops betray you. Ground coffee density varies wildly with roast level — a darker roast is more brittle and less dense, so a level scoop of dark roast can weigh up to a third less than the same scoop of a light roast. Measure by volume and your “same recipe” silently drifts in strength every time you switch bags. Weight eliminates that variable entirely.
There are two camps, and you should pick based on how you like to drink it:
| Style | Ratio (coffee:water) | Example | How to serve |
|---|---|---|---|
| Concentrate | 1:4 to 1:5 | 100 g coffee : 450 g water | Dilute 1:1 with water, milk, or over ice |
| Ready-to-drink | 1:8 to 1:12 | 80 g coffee : 800 g water | Pour straight over ice, no dilution |
I almost always brew a 1:4.5 concentrate, and I recommend you do too. Concentrate is the flexible choice: you can cut it 1:1 to drink, stretch it further on a hot day, freeze it into coffee ice cubes that chill your glass without watering it down, or build an iced latte by pouring it over cold milk. A ready-to-drink batch locks you into one strength and takes up far more fridge space for the same amount of coffee. Make concentrate, dilute to taste, and you have a cold brew bar in a jar.
Step by Step
With your ratio chosen, the method itself takes about five minutes of active work:
- Weigh and grind your coffee coarse. Aim for a grind that looks like coarse sea salt or raw sugar — distinctly chunky, with no powder. For a 1:4.5 concentrate, weigh out your coffee (say, 100 grams) and grind it just before brewing.
- Combine coffee and room-temperature water. Add the grounds to your vessel, then pour in your weighed water (450 grams for that 100-gram dose). Use cool or room-temperature filtered water — not hot.
- Stir thoroughly to saturate. Cold water wets grounds slowly, and dry clumps floating on top won’t extract. Give it a firm stir until every particle is wet and the slurry looks uniform. This 15-second step is the most-skipped and most-rewarding one in the whole process.
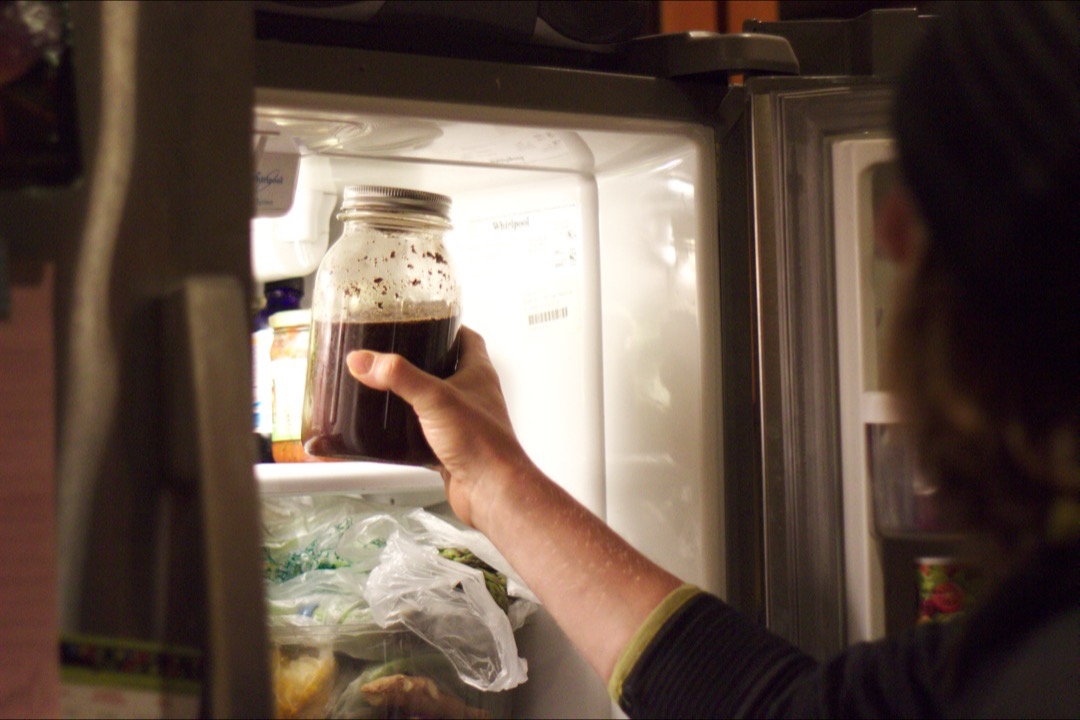
- Cover and steep. Leave it on the counter for 12 to 16 hours, or in the fridge for 16 to 20. Cover it so it doesn’t pick up kitchen or refrigerator odors.
- Strain in two passes. Pour the whole batch through a fine-mesh strainer to catch the bulk of the grounds, then run that liquid through a paper filter, cheesecloth, or clean cloth to remove the fines. Never squeeze or press the spent grounds — that forces bitter, silty solids straight into your finished brew.
- Store and dilute to taste. Decant the concentrate into a clean, sealed glass container and refrigerate. Dilute each serving 1:1 (or to taste) with water or milk over ice.
That’s it. The hardest part is waiting.
Why Cold Brew Tastes the Way It Does
This is where most recipes go quiet, and it’s the part worth understanding, because once you grasp it you can steer the flavor instead of just following steps.
Coffee’s perceived acidity and bitterness come largely from a family of compounds called chlorogenic acids, along with the bitter products they degrade into when exposed to heat. The crucial fact is that these compounds — and many of the sharp, bright, citric acids people associate with hot coffee — are far more soluble in hot water than in cold. Brew with room-temperature water and you simply extract far fewer of them. The cup that results reads as smooth, sweet, and round, even from beans that taste bracingly sharp when pulled as an espresso or a pour-over.
The numbers bear this out. Cold brew typically measures around 6.3 to 6.9 on the pH scale — meaningfully closer to neutral than the same coffee brewed hot. That’s not marketing; it’s why people with acid-sensitive stomachs so often tolerate cold brew when hot coffee bothers them.
What time does is partially substitute for the missing heat. Over a 14-hour steep you extract plenty of the sugars, caramelized compounds, and soluble solids that give cold brew its body and sweetness. But the bright acids and harsh bitter notes never fully come along. That asymmetry — full sweetness and body, muted acidity and bitterness — is the cold brew flavor profile. Understanding it tells you immediately why grind, time, and bean choice each push the cup in a particular direction.
Choosing Beans and Roast
Cold water is a selective extractor, and that changes which beans shine.
Skip your prized light roasts. Light-roast single origins are prized for exactly the bright, floral, fruity acidity that cold water fails to extract. Brew an Ethiopian Yirgacheffe light roast as cold brew and you’ll get a hollow, muted version of a coffee that’s stunning as a pour-over — you’ve paid for nuance the method can’t access. Save those beans for hot brewing.
Reach for medium to medium-dark. These roasts are built around chocolate, caramel, toasted-nut, and brown-sugar notes — all of which extract beautifully in cold water and give cold brew its signature richness. This is the rare case in specialty coffee where a medium-dark roast is genuinely the right technical choice, not a compromise.
Processing matters more than you’d think. Natural (dry-process) coffees carry more fruit-forward, jammy sweetness and tend to make a rounder, more decadent cold brew. Washed coffees stay cleaner and more straightforward. If you like a fruit-bomb iced coffee, seek out a natural-process bean. For dedicated guidance on this, our roundup of the best beans for cold brew breaks down specific roasts and origins.
Freshness, with an asterisk. Always grind fresh from whole beans. But cold brew is forgiving of beans a week or two past their roast-date peak — its long, gentle extraction smooths over the staling that a pour-over would expose. It’s a smart use for the last third of a bag that’s slipping past prime. And if you want the ritual without the caffeine, a good decaf performs unusually well here, because cold brew’s smooth profile masks the slightly flatter body that decaf can have hot.
Grind Size and Why Coarse Wins
Cold brew wants a coarse grind — think coarse sea salt — for two reasons rooted in the long contact time.
First, extraction. Over 12 to 20 hours, even a coarse grind has ample time to give up its sweetness and body. A finer grind, with its vastly larger surface area, over-extracts across that long window, pulling out the very bitter and astringent compounds the cold-water method is supposed to leave behind. Coarse keeps you in the sweet spot.
Second, filtration. Fine grounds and dust pass straight through mesh and cloth, leaving you with a cloudy, silty, gritty cup. Coarse, uniform particles strain out cleanly. This is also exactly why a burr grinder matters: blade grinders produce a scattershot mix of dust and chunks, so you get the over-extraction of fines and the under-extraction of boulders simultaneously, plus cloudiness. If your cold brew is muddy or harsh, your grinder is the first suspect.
Water Quality and TDS
Cold brew is mostly water, so the water you use is a real ingredient, not a footnote.
Aim for filtered water in the range of 75 to 150 ppm total dissolved solids (TDS) — roughly, water with a moderate, balanced mineral content. Those dissolved minerals (chiefly magnesium and calcium) actively help pull flavor compounds out of the coffee and give the cup structure. This is why distilled or zero-TDS water makes flat, lifeless cold brew — with nothing in the water to bind flavor, extraction suffers and the result tastes hollow. At the other extreme, very hard tap water can make the brew taste chalky or muted and will scale your equipment. If your tap water tastes good to drink, a simple carbon filter pitcher is usually all you need. If it tastes heavily of chlorine or minerals, filtered or spring water is a cheap upgrade that you’ll taste in the glass.
Steep Time, Caffeine, and the Seven-Hour Plateau
Here’s where I’ll correct the internet’s biggest cold brew myth: that longer steeping means stronger, more caffeinated coffee. It doesn’t, and the science is clear about why.
Caffeine is highly soluble even in cold water, and studies on cold brew extraction show that caffeine largely plateaus around the seven-hour mark. Steep for 24 hours instead of 14 and you barely move the caffeine needle. What the extra hours do add is the slow extraction of woody, astringent, bitter solids — so you get a more bitter cup with essentially the same buzz. The lever that actually controls caffeine and strength is the ratio, not the clock. Want a stronger, more caffeinated batch? Use more coffee (a 1:4 instead of 1:5), don’t steep it longer.
So why steep 12 to 16 hours at all, if caffeine’s done at 7? Because the flavor compounds — the sugars, the body, the rounded sweetness — keep developing past the caffeine plateau, and 12 to 16 hours is the window where that flavor peaks before bitterness starts to creep in. My practical guide:
- Room temperature, 12–16 hours: brighter, more aromatic, slightly more lively. My default.
- Refrigerated, 16–20 hours: rounder, smoother, more mellow — cold slows extraction, so it needs the extra time.
- Past 18 hours at room temp: diminishing returns, rising bitterness, and a real risk of fermentation in a warm kitchen (sour, winey off-flavors). If yours goes long by accident, taste before committing and dilute more aggressively to rescue it.
Filtering Without the Cloudiness
A clean cup is a two-pass job. The first pass — a fine-mesh strainer or the French press plunger — removes the bulk of the spent grounds. The second pass — a paper filter, cheesecloth, or clean cotton cloth — catches the fine particles (the “fines”) that cause cloudiness and sediment.
The one rule that matters most: do not squeeze, press, or stir the grounds to extract the last drops. It’s tempting — there’s clearly coffee trapped in that wet bed — but squeezing forces the bitterest, siltiest dissolved solids straight through your filter and into the finished brew. Let it drip on its own and accept that you’ll leave a little liquid behind in the grounds. That small sacrifice is the difference between a clean, sweet concentrate and a muddy, harsh one. Paper filters give the cleanest result; cloth and mesh let through a touch more body and oil, which some people prefer. There’s no wrong answer there — it’s a texture preference.
Diluting and Serving
If you brewed a concentrate, it is not meant to be drunk straight — it’ll taste intensely strong and slightly syrupy. Cut it:
- Classic iced cold brew: 1:1 concentrate to cold water (or milk) over ice.
- Iced latte: concentrate over cold milk, no water, adjust to taste.
- Stronger black: dilute 2:1 (more concentrate) if you like it bold.
- Coffee ice cubes: freeze some concentrate in an ice tray and use those cubes in your glass so melting only makes your drink more coffee-flavored, never watery.
Taste as you dilute. The beauty of concentrate is that you set the strength of every individual glass.
How Long It Lasts
Stored sealed in clean glass in the refrigerator:
| Form | Best within | Notes |
|---|---|---|
| Undiluted concentrate | 10–14 days | Higher solids and lower water activity slow spoilage |
| Ready-to-drink | ~7 days | Dilutes the preservative effect of high solids |
Three storage rules earn their keep. Use glass, not plastic — plastic absorbs coffee oils and passes stale aromas to your next batch. Keep it sealed — cold brew readily soaks up fridge odors. Dilute only what you’ll drink now — a pre-diluted batch degrades faster than concentrate. You’ll know it’s past its prime when the sweet, bright character flattens into a dull cardboard staleness, or when it smells sour. It rarely turns dangerous before it turns unpleasant, but the flavor falls off a cliff — drink it in the first week for the cup you brewed it to be. A clean, airtight storage canister kept dark and cold buys you the full two weeks on concentrate.
Cold Brew vs. Iced Coffee: Not the Same Drink
People use the terms interchangeably; they’re different methods with different results.
Iced coffee is simply hot-brewed coffee — drip, pour-over, espresso — poured over ice (or “flash-brewed” directly onto ice). Because it’s extracted hot, it keeps coffee’s full acidity, brightness, and aromatic complexity. It’s lively and nuanced, and it’s made in minutes. The trade-off is that the ice dilutes it, and the hot-extracted acidity can taste sharp once chilled.
Cold brew is never heated. The slow cold extraction yields that smooth, sweet, low-acid profile we’ve spent this guide explaining. It takes hours instead of minutes, but it keeps for two weeks and is gentler on sensitive stomachs.
Neither is “better” — they’re tools for different moods. I make flash-brewed iced coffee when I want the full sparkle of a bright Kenyan in the cup, and cold brew when I want something mellow, sweet, and ready in the fridge whenever I reach for it.
Troubleshooting: Diagnosing a Bad Batch
Cold brew problems trace back to one of a few root causes. Match your symptom:
| Problem | Most likely cause | Fix |
|---|---|---|
| Weak / watery | Ratio too high (not enough coffee), or over-diluted | Brew a stronger concentrate (1:4), dilute less; longer steep won’t fix it |
| Bitter / harsh | Grind too fine, or steeped too long | Grind coarser; cap steep at 16 hrs room temp; never squeeze grounds |
| Sour / winey | Over-steeped and fermenting | Shorten steep, refrigerate instead of counter; toss if clearly fermented |
| Cloudy / silty | Fines from a blade grinder or single-pass filter | Use a burr grinder; add a paper second-pass filter; don’t press grounds |
| Flat / hollow | Zero-TDS water, or light roast | Use filtered water at 75–150 ppm; switch to medium/medium-dark roast |
Notice that grinder, ratio, and water quality account for nearly every complaint — the three things most beginner recipes never mention.
The Bottom Line
Good cold brew is a process of removing variables, not adding effort. Weigh your coffee and water and commit to a 1:4.5 concentrate so strength stays consistent batch to batch. Grind coarse and even — which in practice means owning a burr grinder — so you extract sweetness without silt. Choose a medium to medium-dark roast, because cold water can’t reach the bright notes that make light roasts special. Use decent filtered water, steep 12 to 16 hours (knowing the caffeine’s mostly done at seven), and strain in two gentle passes without ever squeezing the grounds. Store the concentrate sealed in glass and dilute each glass to taste.
Do those things and you’ll make cold brew that’s smoother, sweeter, and more satisfying than anything in a bottle at the store — for a fraction of the price, from beans you chose, dialed to your palate. It remains the most forgiving brewing method I know, which is exactly why it’s the one I reach for when I just want a great cup without thinking about it. Once you’ve got the basics locked, the only real upgrade left is the gear: a steadier cold brew maker and a better grinder are what take a good home batch to one I’d happily score at the cupping table.
Frequently Asked Questions
What is the best coffee-to-water ratio for cold brew?
How long should cold brew steep?
Why does cold brew taste less acidic and bitter than hot coffee?
How long does cold brew last in the fridge?
What kind of coffee beans are best for cold brew?
About the Reviewer

Clara Bennett, CQI Q Grader, SCA Roaster
B.S. Food Science, UC Davis
Clara Bennett is a Coffee Quality Institute (CQI) licensed Q Grader and SCA-certified roaster with over a decade in specialty coffee — from competition barista to production roaster and green-coffee buyer. She has cupped thousands of coffees to CQI protocol and dialed in espresso on everything from $90 entry machines to commercial three-group setups. She founded Brew Gazette in 2026 to turn cupping-table standards into plain-English buying advice.