How to Descale an Espresso Machine: A Q Grader's Guide
CQI Q Grader Clara Bennett explains how to descale an espresso machine properly: the right citric acid ratio, why vinegar can void a Breville warranty, the exact button sequences for Breville, De'Longhi, Philips and Nespresso, and why the descale light sometimes refuses to go out.
Updated
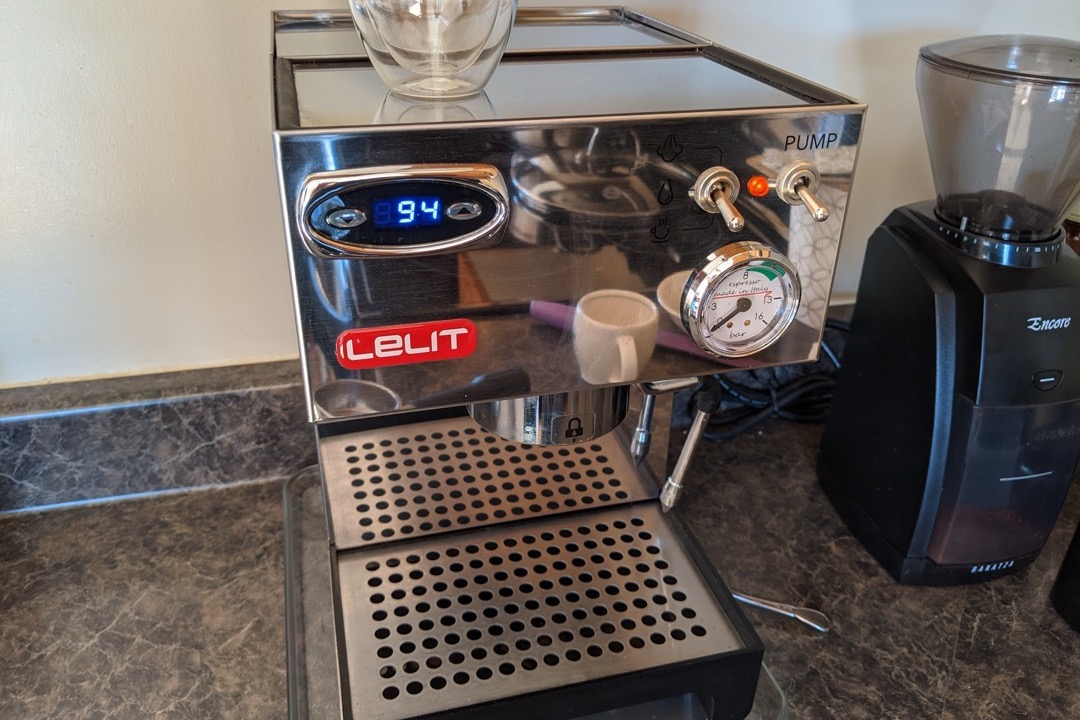
I score coffee for a living, and I have spent enough time at a cupping table to know what an under-extracted shot tastes like. Thin, sour, no crema worth mentioning, a finish that vanishes before it arrives. What surprises people is how often the cause is not the beans, not the grind, and not their technique. It is a few millimetres of chalky mineral crust coating the inside of a boiler they have never seen.
Scale is the quietest failure mode in home espresso. It does not break anything on Tuesday. It insulates the heating element a little more each month, drops your actual brew temperature below the 195 to 205°F window where espresso extracts properly, narrows the tubing so flow rate falls, and eventually seizes a pump or a valve that costs more to replace than the machine is worth. Descaling is the maintenance job that prevents all of it, and it takes about twenty minutes of mostly-waiting.
The problem is that most of the advice out there is copied folklore. Tablespoon measurements that vary by a factor of three depending on whose blog you land on, a blanket “use vinegar” that is genuinely risky on a large share of home machines, and button sequences that are simply wrong. So here is the version I would give a friend, with the numbers sourced and the machine-specific parts checked against the manufacturers.
Why Descaling Matters More on Espresso Than on Drip
Every water-heating appliance scales up. Espresso machines suffer more than most, for three reasons that compound.
The first is temperature. Scale precipitates out of water faster the hotter that water gets, and an espresso boiler runs hotter than a drip machine’s heating element and holds that heat continuously if you leave the machine on. The second is pressure. Espresso extraction runs at around nine bar, which means every restriction in the water path matters. A drip machine with a partly-scaled tube brews a bit slower and nobody notices. A pump machine with the same restriction changes its pressure profile, and the shot changes with it. The third is that the parts are expensive. A scaled solenoid valve or a failed pump on a mid-range machine is a repair bill, not a shrug.
The taste consequence is specific and worth recognising, because it sends people on expensive wild goose chases. Scale insulates the heater, so the water reaching the puck is cooler than the display claims. Cooler water under-extracts. Under-extraction reads as sour, thin and salty, with a short finish. That is exactly what people blame on their beans, and it is why I always ask about descaling before I suggest someone try a different roast or upgrade to a better espresso grinder. A grinder upgrade is a real improvement to a clean machine and a waste of money on a scaled one.
Signs Your Machine Needs Descaling
You do not need a diagnostic. Any two of these together mean it is time:
- Flow has slowed. A shot that used to take 28 seconds now takes 40, at the same grind and dose.
- The pump is louder, or it sputters and surges instead of running smooth.
- Shots run cool and crema is thinner and paler than it used to be.
- Steam pressure has dropped, and the wand takes noticeably longer to texture the same amount of milk.
- White or grey chalky residue is visible in the tank, around the fill line, or on the drip tray.
- The descale light is on. Worth taking seriously even though it is a counter rather than a sensor, since the counter was set by people who know the machine.
If flow has slowed but nothing else has changed, check the obvious things first: your grinder may have drifted finer, or your beans may simply be fresher than last bag. Once you have ruled that out, it is scale.
How Often: Match the Interval to Your Water
The single biggest variable is water hardness, and it varies enormously by municipality. Here is the interval I use, with hardness measured as calcium carbonate:
| Water hardness | Light use (1 to 2 shots a day) | Daily use (3 to 6 shots) | Heavy use (7+ shots) |
|---|---|---|---|
| Soft, under 60 mg/L | Every 4 months | Every 3 months | Every 2 months |
| Moderate, 60 to 120 mg/L | Every 3 months | Every 2 months | Every 6 weeks |
| Hard, 120 to 180 mg/L | Every 2 months | Monthly | Every 3 weeks |
| Very hard, over 180 mg/L | Monthly | Every 3 weeks | Every 2 weeks |
If you brew exclusively with filtered or bottled water, or you have an in-tank softener cartridge that you genuinely replace on schedule, move one row up the table. If you use unfiltered tap water in a hard-water region and leave the machine switched on all day, move one row down.
Testing Your Water Hardness
Two easy routes. The cheap one is a water hardness test strip, sold in packs for a few dollars, which gives you a colour reading in about ten seconds. The free one is your utility’s annual water quality report, published as a Consumer Confidence Report in the US, which lists hardness directly. If yours reports in grains per gallon rather than mg/L, multiply by 17.1 to convert.
Do this once. Your water is not going to change, and knowing the number converts descaling from a guess into a schedule. It also tells you whether a softening cartridge is worth bothering with, which is the difference between descaling monthly and descaling three times a year.
Choosing a Descaling Solution
Three options, and the right one depends mostly on what your boiler is made of.
Citric Acid: the Cost-Effective Choice for Stainless and Brass
Food-grade citric acid is what I use on my own pump machine. It is a stronger chelator than acetic acid for calcium carbonate, it rinses clean without lingering smell, and a bag of it costs very little and lasts years.
The concentration matters more than any other single number in this article, and it is the number everybody gets vague about. The working range is 15 to 25 grams per litre of warm water. I use 20 g/L for a stainless or brass boiler on moderately hard water, and go to the top of the range, 25 g/L, only for a machine that has clearly been neglected on very hard water. Two rules hold regardless: use food-grade (USP) citric acid, not the technical grade sold for cleaning, because this touches something you drink from. And do not exceed a 5% solution or leave acid sitting in the boiler longer than about 30 minutes. Stronger and longer is not better here. Acid that has finished dissolving scale starts working on metal.
If you are measuring by volume because you do not have a scale, a level tablespoon of citric acid powder is roughly 15 grams, so a heaping tablespoon per litre lands you near the middle of the range. A kitchen scale is better.
Manufacturer and Third-Party Descalers
Breville’s descaler, De’Longhi EcoDecalk, Jura’s tablets, Durgol Swiss Espresso and Urnex Dezcal all do the same chemistry with a few genuine advantages. They are pre-measured, so you cannot get the ratio wrong. They are formulated to be gentle on aluminum and on the seals inside a specific brand’s machines. And on a machine still under warranty, using the manufacturer’s product removes any argument about what caused a failure.
For a super-automatic, a pod machine, or any machine still covered, use the manufacturer’s descaler. The cost difference over a year is small, and the machines that most need the guardrails are the ones where the boiler is hardest to reach.
Why Vinegar Is Risky Here
Vinegar is the default advice on the internet, and it is fine on a drip machine. I recommend it myself in our guide to cleaning a coffee maker. On an espresso machine, three things argue against it.
Breville explicitly warns against vinegar in its manuals, and using it can void your warranty. Acetic acid is also slower at this job: it takes roughly three and a half times as long to dissolve the same quantity of scale as citric acid, which means a much longer dwell time inside the machine. And the smell clings to internal tubing and rubber gaskets in a way that citric acid does not, so the next several shots carry it.
The Aluminum Boiler Problem Nobody Mentions
This is the part that almost every descaling guide skips, and it matters for a surprising number of machines.
Acid pits aluminum. At the concentrations used for descaling, contact with aluminum for an extended period causes visible corrosion, which in a boiler means both a damaged pressure vessel and aluminum in your coffee. And aluminum boilers are not rare in home espresso. The Gaggia Classic, one of the most widely recommended entry-level pump machines ever made, used polished aluminum boilers from 1977 through 2014, briefly shipped a stainless version in 2015, went back to aluminum in 2019, moved to a non-stick coated aluminum boiler in 2023, and reintroduced the polished aluminum boiler in 2024. Only the newest Classic Pro E24 switched to brass. So if you own a Gaggia Classic, the odds are strongly that you own an aluminum boiler.
The rule for aluminum: stay at the low end of the concentration range, around 10 to 15 g/L of citric acid, keep the dwell time short, and rinse harder than you think you need to. Or skip the DIY route entirely and use the manufacturer’s descaler, which is formulated for it. Never use vinegar in an aluminum boiler.
The same logic is why I tell people never to descale a moka pot with a strong acid soak. Moka pots are almost universally aluminum, they are also small enough to clean mechanically, and a warm soapy scrub plus a rinse handles them. Our guide to using a moka pot covers that maintenance, and if yours has corroded past saving, the best moka pots roundup has current stainless options that tolerate descaling properly.
How to Descale an Espresso Machine: Step by Step
This is the generic procedure for a pump machine. Machine-specific button sequences are in the next section.
- Empty and rinse the tank. Remove the water filter or softener cartridge if your machine has one. Acid will exhaust it in one cycle, and the filter will also partly neutralise your solution, which defeats the point.
- Mix the solution in warm water. Citric acid dissolves readily at around 20 g/L, or follow the manufacturer’s dosing. Stir until completely clear, since undissolved granules do nothing and can settle in the tank.
- Remove the portafilter and put a large container under the group head. Empty the drip tray too. You will be pushing more water through than a normal shot.
- Enter descale mode, if the machine has one, and let it run. If it has no descale program, run water through the group head in short bursts, pausing between them, until about a third of the tank is gone.
- Let it sit for 15 to 20 minutes. This is the part that actually dissolves the crust, and it is the step people skip. Do not exceed 30 minutes.
- Run the rest of the solution through, alternating between the group head and the hot water or steam outlet so the acid reaches every path. Scale builds in the steam circuit too, and a descale that only goes through the group leaves half the job undone.
- Rinse with at least three full tanks of fresh water, running each through both the group head and the steam wand. This is not optional and three is not a conservative number. Residual acid tastes metallic and sour, and it keeps working on your seals.
- Reinstall the filter cartridge, then pull two or three throwaway shots before you brew anything you intend to drink. Taste the water first if you want to be sure. If there is any sourness or metallic edge, rinse again.
The whole thing is about twenty minutes, of which fifteen are waiting.
Descaling by Machine Type
Pump and Semi-Automatic Machines
Breville Barista series. The descale mode sequence trips people up and is frequently reported wrong. Press and hold the 2 CUP button, then while still holding it, press and hold POWER. Keep holding both until the POWER light begins to flash, which confirms you are in descale mode. When POWER, 1 CUP, CLEAN/DESCALE and HOT WATER/STEAM are all lit solid, the machine is ready. If the 1 CUP light comes on instead, you did not hold long enough, or the machine still wants a cleaning cycle first. Use Breville’s descaler, not vinegar.
Gaggia Classic. No descale program. You fill the tank, pull the solution through the group in bursts, and run some through the steam wand, manually. Check your boiler material first, as covered above, and dose accordingly.
Other pump machines. Lelit, Rancilio, Profitec and similar prosumer machines mostly have no automated descale routine and expect the manual procedure. The plus side is that you control the dwell time exactly. Check the manual for boiler material before mixing. If you are still shopping and want to know which machines are easiest to live with on hard water, our best espresso machines roundup calls out boiler material and filter support for each pick.
Super-Automatic Machines
De’Longhi, Philips and Jura all run guided programs, and you should use them rather than improvising. Load the manufacturer’s descaler into the tank at the dose on the bottle, select the descale routine in the menu, and let the machine run its own cycle, which typically alternates pumping and pausing on a schedule tuned to its internal circuit. Jura’s system is built specifically around its own tablets and cartridge, and substituting a homemade solution is a bad trade on a machine at that price.
The one thing to watch on super-automatics is that the program has a rinse phase after the acid phase. Quitting once the descale stage finishes is the most common reason these machines keep complaining afterwards.
Pod Machines
Nespresso and similar pod systems use their own descaling kit and model-specific button sequences, and the internal water circuit is small, sealed and unforgiving of a too-strong solution. Follow the official procedure for your model family rather than a generic one. The same applies to most pod and capsule brewers: the maintenance is prescribed because the plumbing is not serviceable. If you own a pod machine and want something that tolerates less ceremony, the best single-serve coffee makers guide flags which models have straightforward descaling routines.
Descaling vs Backflushing vs Cleaning
Three different jobs, routinely confused, and each leaves a distinct flavour signature when neglected.
Descaling removes minerals with acid, from the tank, boiler and tubing. Neglected, it gives you cool, slow, sour shots. Every few weeks to a few months.
Backflushing removes coffee oils from the group head and the plumbing behind the shower screen, using an alkaline detergent and a blind basket that forces water backwards. Neglected, it gives you rancid, bitter espresso no matter how fresh your beans are. Weekly, on machines built for it: that means a three-way solenoid valve, or on Breville’s Barista series, the supplied silicone cleaning disc and tablet that drives the CLEAN ME cycle. Machines without either get the shower screen and dispersion block scrubbed by hand instead.
Cleaning is everything else: the portafilter and baskets, the steam wand purged and wiped after every use, the drip tray, the bean hopper and the grinder burrs. Neglected, it stales everything downstream of it.
All three matter, and doing one does not cover the others. If your shots taste wrong and you have descaled recently, the problem is almost certainly oils rather than minerals, and a backflush or a group-head scrub is the next move. If you are chasing flavour more broadly, the best coffee beans for espresso guide and our walkthrough on making espresso at home cover the input side of the same equation.
Preventing Scale in the First Place
Descaling is a repair. Prevention is cheaper, and there are only three levers worth pulling.
Use better water. Water is around 98% of what is in your cup, so this improves flavour and slows scale at the same time. Filtered water from a jug filter is a large improvement over hard tap water. Distilled water is not the answer, though, and this catches people out: espresso needs some mineral content to extract properly, and many machines with water-level sensors cannot read pure distilled water at all. Filtered, or a purpose-made brewing water, not distilled.
Actually replace the in-tank cartridge. Most machines that ship with a softener cartridge come with a reminder dial on it that nobody ever sets. A spent cartridge is doing nothing while making you believe you are protected, which is worse than having none.
Empty the boiler if you are away. If the machine will sit unused for weeks, run the tank down and switch it off rather than leaving hot standing water in it. Scale forms fastest in water that is heated and then sits.
One last thing worth saying plainly. Descaling a machine you already own returns more cup quality per dollar than almost any upgrade you can buy. If your shots have drifted, descale first, backflush second, and only then start thinking about whether your grinder is the limiting factor. When it genuinely is, our best coffee and espresso grinders roundup and the best hand espresso grinders guide are where I would start. But I have talked more people out of a grinder purchase with a bag of citric acid than I have talked into one.
Frequently Asked Questions
How often should I descale my espresso machine?
Can I use vinegar to descale my espresso machine?
What is the difference between descaling and backflushing?
Why won't my descale light turn off after I already descaled?
Do super-automatic and pod machines descale differently than pump machines?
Related Articles
How to Clean a Coffee Maker: A Q Grader's Complete Guide
maintenance-cleaning
How to Make Espresso at Home: A Q Grader's Complete Guide
espresso-machines
How to Use a Moka Pot: A Q Grader's Step-by-Step Guide
manual-brewers
7 Best Espresso Machines of 2026
espresso-machines
Best Coffee Beans for Espresso in 2026 (Q Grader Tested)
coffee-beans
About the Reviewer

Clara Bennett, CQI Q Grader, SCA Roaster
B.S. Food Science, UC Davis
Clara Bennett is a Coffee Quality Institute (CQI) licensed Q Grader and SCA-certified roaster with over a decade in specialty coffee — from competition barista to production roaster and green-coffee buyer. She has cupped thousands of coffees to CQI protocol and dialed in espresso on everything from $90 entry machines to commercial three-group setups. She founded Brew Gazette in 2026 to turn cupping-table standards into plain-English buying advice.