How to Make Espresso at Home: A Q Grader's Complete Guide
CQI Q Grader and SCA roaster Clara Bennett explains how to make espresso at home: the 18-in, 36-out recipe, grind, puck prep, water, how to read a shot, milk drinks, and the honest no-machine options.
Updated
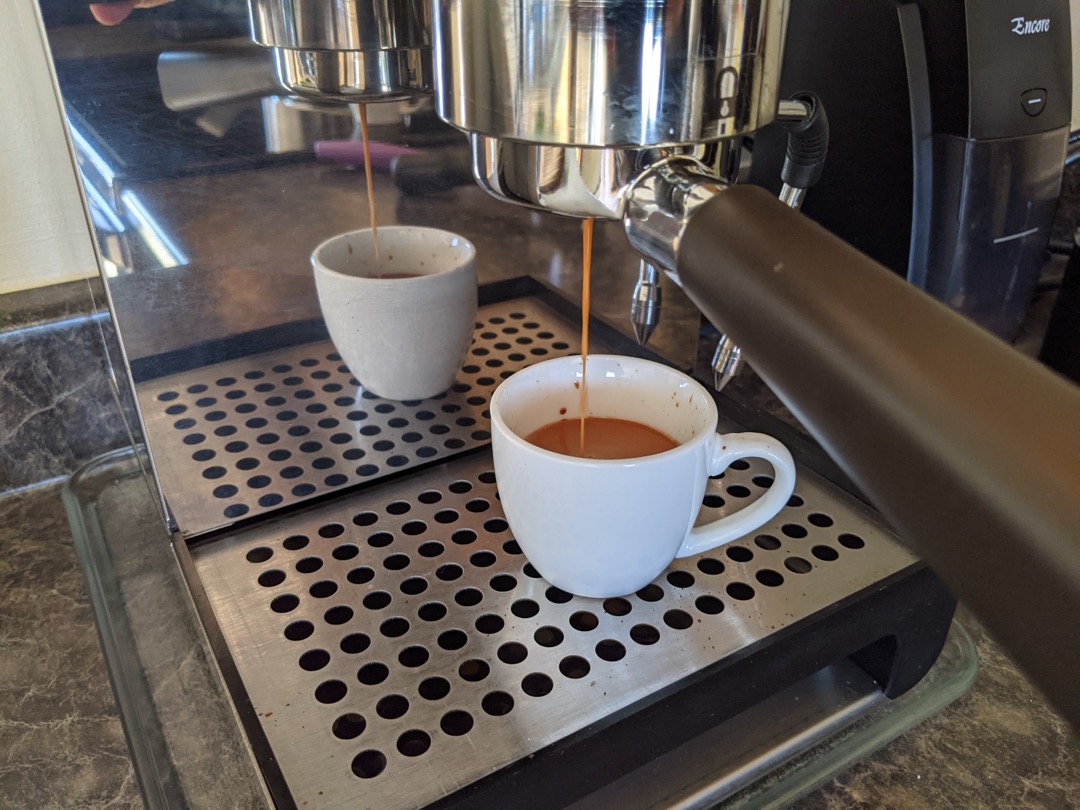
Espresso is the most rewarding thing you can learn to make at home and the most unforgiving. I score coffee for a living, and at the cupping table I get to taste a coffee under standardized conditions where the brewing barely varies. Espresso is the opposite. It compresses an entire extraction into 25 seconds, and every variable you have not controlled shows up in the cup, loudly. That is why so many people buy a machine, pull a few sour or scorched shots, and quietly go back to drip.
The good news is that learning how to make espresso at home is not a matter of talent or an expensive machine. It comes down to a small set of variables you control in a specific order: the beans and their age, the grind, the dose, the yield, the time, the water, and how evenly you prepare the puck. Get those right and a modest setup makes shots that beat most cafe coffee, because your beans are fresher and you are pulling one shot instead of four hundred. This guide covers the machine method properly, the honest version of the no-machine methods, how to read what your cup is telling you, and how to turn a shot into a latte or a cappuccino. If you are still choosing hardware, our best espresso machines roundup is where to start.
What Espresso Actually Is (and Why 9 Bar)
Espresso is defined by pressure, not by strength, darkness, or cup size. It is coffee brewed by forcing hot water through a compacted bed of finely ground coffee at roughly 9 bar, which is about 130 psi, or nine times the pressure of the atmosphere around you. Everything distinctive about espresso follows from that number. The pressure drives water through a bed so fine it would clog any gravity brewer. It dissolves carbon dioxide into the liquid under pressure, which comes out of solution as the shot hits the cup. And it shears the coffee’s oils into an emulsion of droplets small enough to stay suspended rather than floating on top. Those two effects together, dissolved gas plus emulsified oil, are crema and body.
The obvious question is why 9 and not 6 or 12. The honest answer is that 9 bar is a design convention, not a physical constant. Achille Gaggia’s spring lever machines in the late 1940s produced roughly 8 to 10 bar as the spring decompressed, and that is the pressure at which Italian coffee culture first learned what espresso tasted like. When motorized pumps arrived, most famously with the Faema E61 in 1961, manufacturers targeted the pressure the market already expected, and 9 bar became the industry standard by inheritance. Modern research and a good number of working baristas will tell you that 6 to 7 bar often tastes better, which is why pressure profiling machines that ramp down mid-shot have become popular. If your machine has a fixed 9 bar pump, you are working within a perfectly good convention. Just do not treat the number as a law.
Two consequences matter for the rest of this guide. First, the pressure requires a grind fine enough to create resistance, which means a grinder built for espresso, not a general purpose one. Second, that same pressure will find any weakness in your coffee bed and exploit it, which is why puck preparation gets its own section below. For the wider comparison of espresso against filter coffee, see our espresso vs coffee explainer.
What You Need
- A machine with a real pump and a 58 mm or 54 mm portafilter. Pressurized (dual-wall) baskets that ship with entry machines create artificial crema through a pinhole and hide grind errors, which is fine for a week and then becomes a ceiling. Swap to a standard single-wall basket as soon as you can. Our best espresso machines guide covers what to look for at each level.
- A grinder that adjusts finely at the espresso end. This matters more than the machine. Espresso needs adjustment steps small enough to change a shot by two or three seconds, which a general purpose burr grinder usually cannot do. A dedicated espresso grinder is the highest-return purchase in the whole setup. If you brew filter as well, an espresso and coffee grinder that spans both ranges saves counter space, and a good hand espresso grinder delivers commercial-grade burrs for far less money if you only pull one or two shots a day.
- A scale that reads to 0.1 g. You are weighing an 18 g dose and a 36 g yield. A kitchen scale that rounds to whole grams cannot resolve either well enough.
- A tamper that matches your basket diameter, ideally self-levelling. A 58 mm tamper in a 58.5 mm basket leaves an unsealed ring at the edge.
- A distribution tool or a WDT needle tool. Cheap, and the single biggest upgrade to shot consistency after the grinder.
- Fresh whole beans, ideally roasted for espresso. Our best coffee beans for espresso picks are chosen for exactly this.
- A milk frother if you drink milk drinks and your machine has no steam wand.
The Recipe: 18 In, 36 Out, 25 to 30 Seconds
Start here every time, with any coffee, and adjust from the result:
- Dose: 18 g of ground coffee into an 18 g basket.
- Yield: 36 g of liquid espresso in the cup, weighed, not eyeballed. This is a 1:2 ratio, called a normale.
- Time: 25 to 30 seconds from the moment you start the pump.
- Temperature: 195 to 205 degrees Fahrenheit, which is 90.5 to 96 Celsius.
- Grind: fine, roughly the texture of table salt, adjusted until the time lands in range.
Weigh the output, not the volume. Espresso volume is mostly crema on some coffees and mostly liquid on others, so a “double shot line” on a shot glass tells you very little. A 1:2 ratio by weight is repeatable across every bean you will ever buy.
Two legitimate variations are worth knowing. Some very good baristas, CoffeeGeek among them, prefer a longer yield of 40 to 45 g and cut the shot on blonding, the moment the stream turns from dark caramel to pale straw, rather than on a fixed number. That approach is taste-driven rather than recipe-driven and it works, particularly on lighter roasts that need a longer yield to taste sweet. The fixed-weight approach is easier to reproduce and easier to debug when a shot goes wrong, which is why I teach it first. Use the recipe to get consistent, then start cutting on taste once you know what your machine does. And 25 to 30 seconds is a starting window, not a rule: shots out to 35 seconds are entirely defensible if the cup is sweet and balanced.
Temperature should move with roast level. Darker roasts are more soluble and turn bitter fast, so pull them nearer 195. Lighter roasts are dense and resist extraction, so push toward 203 to 205. Ignore any advice that hands you 190 as a default; that is below the range where most coffee extracts properly and it is a reliable route to sour, hollow shots.
Grind: The One Variable You Adjust
Once the recipe is fixed, grind is the dial you turn. Everything else stays put.
If your 18 g dose runs to 36 g in under 20 seconds, the grind is too coarse. Water is finding too little resistance, extraction is incomplete, and the cup will be sour and thin. Go finer. If it takes more than about 35 seconds, the grind is too fine, the puck is choking, and the cup will be bitter and drying. Go coarser. Change one step at a time and pull a whole shot after each change, because grinders retain a small amount of old coffee in the chute and the first shot after an adjustment is a blend of two settings. Purge a few grams if you are chasing a fine difference.
Espresso grind also drifts with the coffee itself. Beans get more soluble as they age past the degassing window, so a setting that was perfect on day 8 often runs fast by day 20 and needs to go finer. Humidity moves it too. This is the reason pre-ground espresso cannot really work: the correct grind is not a fixed property of the coffee, it is a property of the coffee on that day, in your kitchen.
The Beans: Roast, Freshness, and the Degassing Window
Roasting fills coffee with carbon dioxide, and that gas has to leave before the coffee brews well under pressure. Beans straight out of the roaster are effectively unusable for espresso: excess CO2 pushes water away from the grounds, disrupts the flow, and gives you a gushing, foamy, thin shot with a sharp edge. Coffee is typically underdeveloped for espresso until about four days off roast, and for most coffees the sweet spot sits between 7 and 14 days. Lighter and denser coffees can want longer, sometimes three weeks. After about three to four weeks in a sealed bag, aromatics fade, crema thins, and the cup flattens toward a dull, papery character.
Buy beans with a roast date printed on the bag, not a best-before date twelve months out. A best-before date tells you the roaster does not expect you to care when the coffee was roasted.
Grinding changes the clock entirely. Whole beans hold their aromatics reasonably well for weeks because the volatile compounds are locked inside the cellular structure. Grinding exposes enormous surface area and most of those aromatics are gone within minutes. That is not a marketing claim from grinder companies; it is why a freshly ground dose smells extraordinary and the same coffee ground twenty minutes earlier smells like nothing. Grind into the portafilter, immediately before you pull.
On species, most espresso blends are Arabica, sometimes with a percentage of Robusta added for body and crema. Robusta brings more caffeine, more crema, and a rubbery, grain-like note that some traditional Italian palates love and most specialty drinkers do not. Our Arabica vs Robusta piece covers the differences if you are deciding whether a blend with Robusta suits you. For picks that work well at a 1:2 ratio out of the box, see our best coffee beans for espresso roundup, or our broader best coffee beans guide if you brew filter too.
Water (Nobody Talks About This)
Espresso is about 90 percent water by weight, and the mineral content of that water changes both what you taste and how long your machine lasts. This gets almost no coverage in home espresso guides and it explains a surprising number of unsolvable-seeming problems.
Minerals in water, chiefly calcium and magnesium, actively bind to flavor compounds during extraction. Water with almost no minerals, such as distilled or heavily reverse-osmosis-filtered water, extracts poorly and gives you a flat, hollow, slightly salty cup no matter how good the technique. It can also be corrosive to boilers, and many machines use water conductivity to sense the boiler level, so pure water can confuse the machine outright. At the other end, hard water full of calcium builds limescale on the heating element and inside the group, which slowly kills temperature stability and eventually the machine.
The SCA target is roughly 150 mg/L total dissolved solids with an acceptable band of about 75 to 250, hardness near 68 mg/L as calcium carbonate, alkalinity around 40 mg/L, no chlorine, and a pH near 7. In practice, three things get you most of the way there: use filtered water rather than straight tap if your tap is chlorinated, avoid distilled and pure RO, and descale on schedule if your water is hard. If you live somewhere with famously hard water and your shots taste dull and chalky, water is the first thing I would change, ahead of beans.
Puck Prep: Distribution, Tamping, and Channeling
Everything in this section exists to solve one problem: channeling. Water under 9 bar behaves like water under 9 bar. It does not spread politely through the coffee; it finds the path of least resistance and takes it. If one region of your puck is looser than the rest, water carves a channel there, races through, and barely touches the rest of the bed. The result is a shot that is simultaneously over-extracted (in the channel, where water scoured the same grounds repeatedly) and under-extracted (everywhere else). That contradiction is why channelled shots taste hollow and drying at the same time, and why chasing them with grind adjustments never works.
Three techniques prevent it.
WDT (Weiss Distribution Technique). Ground coffee falls out of a grinder in clumps, and clumps are density differences waiting to become channels. Stir the dry bed with a set of fine needles, around 0.3 to 0.4 mm, in a gentle circular and up-down motion for a few seconds before tamping. This breaks clumps and evens density throughout the bed, not just at the surface. It is the highest-impact, lowest-cost improvement available to a home setup.
RDT (Ross Droplet Technique). Spritz the whole beans with a single fine mist of water, or stir them with a damp spoon, before grinding. Grinding generates static, static makes grounds cling to the chute and fly out as a mess, and clumping gets worse. A tiny amount of moisture kills the static almost completely. The amount is genuinely small, a drop or two for a dose, and it does not measurably change extraction.
Tamping. Level matters far more than force. A tamp that is 30 pounds but tilted two degrees produces a wedge-shaped puck where one edge is looser, and water goes straight there. A 20 pound tamp that is perfectly flat gives you an even bed. Set the portafilter on a flat surface, keep your wrist straight above it, press until the grounds stop compressing, and stop. Do not tap the side of the basket after tamping to “settle” it; that cracks the puck.
Underlying all three is basket and dose matching. An 18 g basket wants roughly 18 g, give or take half a gram. Put 15 g in an 18 g basket and there is headroom above the puck, the bed shifts when the shower screen wets it, and channels form at the edges. Put 21 g in and the puck presses against the screen, which can leave grounds stuck to it and disrupt even wetting. Match the dose to the basket that came with your machine and adjust in tenths, not grams.
How to Make an Espresso Shot, Step by Step
- Turn the machine on early. A home machine needs 15 to 30 minutes for the group head and portafilter to reach thermal equilibrium, not just the boiler. Shots pulled on a cold group run cold and taste sour, which is the single most common cause of “my machine makes bad espresso in the morning.”
- Weigh 18 g of whole beans and grind straight into the portafilter. Spritz the beans first if static is a problem.
- Distribute with WDT. Stir the dry grounds with fine needles for a few seconds until the bed looks uniform and fluffy.
- Tamp level. Press straight down until compression stops. Check by eye that the puck surface is flat and parallel to the basket rim.
- Purge the group with a one-second flush to clear stale water and stabilize temperature, then lock the portafilter in immediately. Leaving a loaded portafilter in a hot group cooks the coffee.
- Put the cup on the scale, tare, and start the pump. Start your timer at the same moment.
- Watch the first drops. They should appear somewhere between 5 and 12 seconds. Earlier than that means the grind is far too coarse; much later means it is too fine or the dose is too high.
- Watch the stream. You want a thin, steady, dark caramel flow with no spraying or twisting. On a bottomless portafilter, sprays and side jets are visible channeling.
- Stop at 36 g, normally between 25 and 30 seconds. If you are cutting on taste instead, stop when the stream blondes.
- Drink it now. Espresso does change as it sits, and the aromatics do fade, but the “ten second rule” that says a shot dies the moment it hits the cup is a myth. Degradation is gradual over roughly 10 to 30 minutes as crema collapses and volatiles escape. The rule started as cafe workflow discipline, a way to make sure baristas served promptly, and it got repeated until it sounded like chemistry.
Reading the Shot: What Your Cup Is Telling You
Cupping teaches you to name a fault and trace it to a cause. Here is that framework applied to espresso. Note that astringency is a separate row from bitterness, because it is a tactile sensation rather than a taste, and it points somewhere completely different.
| What you taste | What it means | The fix |
|---|---|---|
| Sour, sharp, thin, salty | Under-extraction. Water passed too fast or too cool. | Grind finer, raise temperature toward 203, check the group was fully warmed |
| Bitter, ashy, burnt | Over-extraction. Too much contact, too hot, or too long. | Grind coarser, cut the yield shorter, drop temperature toward 195 on dark roasts |
| Drying, mouth-puckering, lingering rasp (astringency) | Usually channeling, not simple over-extraction. Water scoured part of the bed and skipped the rest. | Fix puck prep first: WDT, level tamp, correct dose. Do not touch the grinder yet |
| Hollow, weak middle, no sweetness | Uneven extraction, or a dose too small for the basket | Match dose to basket, redistribute, check for a cracked or tilted puck |
| Gushing, pale, foamy, done in 15 seconds | Grind far too coarse, dose too low, or beans too fresh and still gassing | Grind finer, raise the dose, rest very fresh beans a few more days |
| Fermented, woody, papery, cardboard | Bean fault, not technique. Stale, defective, or badly stored coffee. | Change the coffee. No dialing fixes this |
That last row is the one home baristas most often miss. If a coffee tastes like wet cardboard or old wood at every grind setting you try, stop adjusting. You are tasting the bean, and the only fix is a fresher bag.
How to Make Espresso Without a Machine
This is the most searched question in home espresso, and it deserves an honest answer rather than a sales pitch. You can absolutely make excellent, strong, concentrated coffee without a machine. You cannot make espresso, and the reason is mechanical rather than snobbery.
Crema is a foam of carbon dioxide that was dissolved into the liquid under pressure and comes out of solution as the pressure drops at the spout. Espresso’s syrupy body comes from coffee oils sheared into an emulsion of droplets fine enough to stay suspended. Both effects require force, roughly 9 bar of it, applied across a compacted bed. Steeping coffee, plunging it, or pushing it gently through a filter operates at or barely above atmospheric pressure, which cannot dissolve meaningful CO2 into the liquid and cannot emulsify oil. No grind size and no ratio changes that, because grind and ratio control strength and extraction, not pressure. What you can replicate is concentration and intensity. What you cannot replicate is texture.
With that established, here are the three methods that get closest.
Moka pot (closest, and genuinely good). A stovetop moka pot builds about 1 to 1.5 bar, which is meaningfully above atmospheric and produces a strong, low-acid, chocolatey concentrate with real body by non-espresso standards. It is the best no-machine base for milk drinks by a wide margin. Grind finer than drip but coarser than espresso, fill the basket level without tamping, start with hot water, keep the heat low, and pull it off at the first gurgle. Our how to use a moka pot guide walks through each of those and why they matter, and our best moka pots roundup covers sizes and induction compatibility. Keep any “as good as espresso” claim scoped to strength and flavor. It will not give you crema or espresso body, and any thin foam on top of a moka brew is not crema.
AeroPress (most controllable). Your arm generates well under 2 bar through an AeroPress, so it is not making espresso either, but it gives you more control than anything else on this list. For an espresso-style concentrate, use about 18 g of fine grind, roughly 50 to 60 g of water just off boil, stir for 10 seconds, then press slowly and steadily over 30 seconds. The paper filter removes oils and fines, which makes the cup cleaner and, as it happens, less espresso-like in texture even as the strength climbs. A metal filter keeps more oils and body. The AeroPress is also the most forgiving of a mediocre grinder, which makes it a sensible starting point before committing to espresso hardware.
French press (last resort). Immersion at atmospheric pressure with a mesh filter. You can make a very strong concentrate by using a 1:5 or 1:6 ratio and a medium-fine grind steeped for about four minutes, and it will taste bold. It will also be muddy with fines, since the mesh passes everything small enough to slip through, and it has no textural relationship to espresso at all. Use it if it is what you own. Do not buy one for this purpose.
If you find yourself doing any of the above regularly and wishing for real crema, that is the signal to look at an actual pump machine. Even entry-level machines in our best espresso machines guide clear 9 bar, and paired with a decent espresso grinder they make espresso in the strict sense.
How to Make a Latte, Cappuccino, or Macchiato From Your Shot
Every espresso milk drink is the same two ingredients in different proportions and different foam textures. Once you know the ratios you can order or build any of them.
| Drink | Espresso | Steamed milk | Foam | Typical cup |
|---|---|---|---|---|
| Espresso macchiato | 1 to 2 shots | none | 1 to 2 spoons of foam | 3 oz demitasse |
| Cortado | 1 double | ~2 oz | very thin | 4 to 5 oz glass |
| Cappuccino | 1 double | ~2 oz | ~2 oz airy foam | 5 to 6 oz cup |
| Flat white | 1 double | ~4 to 5 oz | thin microfoam, ~0.5 cm | 5 to 6 oz cup |
| Latte | 1 to 2 shots | ~6 to 8 oz | ~1 cm microfoam | 8 to 12 oz cup |
| Americano | 1 to 2 shots | none | none | shot plus 4 to 6 oz hot water |
Milk and water contribute no caffeine at all, so every drink in that table carries exactly the caffeine of the shots underneath it: about 63 mg on a single, about 125 mg on a double, regardless of cup size. Our guide to how much caffeine is in espresso has the full numbers against drip and against a mug of filter coffee.
Two practical notes. A cappuccino and a flat white use the same amount of coffee and roughly the same cup; the difference is entirely foam texture and volume, with the cappuccino carrying a thick, airy cap and the flat white a thin, glossy, paint-like microfoam. And for an americano, pour the water first and the shot second if you want to preserve some crema on top.
How to Make a Latte Without an Espresso Machine
You need two things: a strong coffee concentrate and textured milk. Neither requires an espresso machine.
For the concentrate, a moka pot is the best option, at roughly 2 oz of moka coffee standing in for a double shot. An AeroPress concentrate at 18 g to 55 g works nearly as well. For the milk, heat it to about 140 to 150 degrees Fahrenheit, hot enough to be sweet but below the point where milk proteins start to taste cooked, then texture it. A handheld or electric milk frother does this in about 30 seconds. Even a sealed jar shaken hard for 30 seconds and then microwaved for 30 seconds produces usable foam. Pour the concentrate into the cup first, then pour the milk in from a low height with the foam held back by a spoon, releasing the foam last. Our how to froth milk guide covers the technique in detail, including how to get microfoam rather than the stiff bubble raft most people end up with.
Because moka and AeroPress concentrates are bold and low in acid, they cut through milk cleanly instead of getting lost the way a drip coffee would. This pairing, a moka pot plus a frother, is one of the highest-value combinations in home coffee. Espresso also anchors iced and cocktail drinks like shaken espresso and the espresso martini, but those are recipe territory and a separate guide.
Crema: What It Does and Doesn’t Tell You
Crema became the visual shorthand for espresso quality, and it is not a reliable one. Crema is a foam of carbon dioxide stabilized by melanoidins and emulsified oils. Its volume tracks three things: how much CO2 the coffee still holds, which is mostly a function of roast level and days off roast; the species, since Robusta produces noticeably more crema than Arabica; and how dark the roast is, since darker roasts hold more gas and more surface oil.
None of those three are quality. This is why a supermarket blend heavy on Robusta, roasted dark, can throw a thick, persistent, photogenic crema over a cup that tastes rubbery and flat, while a beautiful light-roast single origin at day 12 produces a modest, quickly-collapsing crema over a shot that is sweet and complex. Very fresh coffee also over-produces crema in a way that is actively a problem: the excess gas disrupts flow and gives you a foamy, thin, gushing shot. That is the case for resting beans a few days rather than pulling straight from the roaster.
What crema is genuinely useful for is diagnosis. Its color tells you about the flow: pale, blonde, bubbly crema that collapses in seconds usually means the shot ran fast and under-extracted. A dark, thin, oily-looking crema on a slow shot suggests over-extraction. Big irregular bubbles rather than a fine, tight surface often indicate channeling. Read crema as a gauge, not as a grade.
The Bottom Line
Making espresso at home comes down to controlling a short list in a fixed order. Buy beans with a roast date and use them between about 7 and 14 days off roast. Grind fresh, into the portafilter, on a grinder that adjusts finely at the espresso end. Dose 18 g into an 18 g basket, distribute with WDT, tamp level, and pull to 36 g in 25 to 30 seconds at 195 to 205 degrees Fahrenheit. Use filtered water that has minerals in it but not too many. Then taste, and move exactly one variable.
If a shot is sour, grind finer. If it is bitter, grind coarser. If it dries your mouth out and lingers, fix the puck before you touch the grinder. If it tastes like cardboard at every setting, buy fresher coffee. That decision tree covers the large majority of problems people write to me about.
And if you do not own a machine yet, start with a moka pot and a hand grinder. You will learn grind, dose, and extraction on inexpensive gear, and everything you learn transfers directly when you upgrade to a proper espresso machine and a dedicated espresso grinder. The order that actually matters is grinder first, beans second, machine third. Almost everyone does it backwards.
Frequently Asked Questions
How do you make espresso without a machine?
Is espresso stronger than coffee, and is one shot equal to a cup?
Why is my espresso sour or bitter?
How many shots is an espresso, and what are ristretto and lungo?
Can you make espresso with regular pre-ground or instant coffee?
Related Articles
How Much Caffeine Is in Espresso? A Q Grader Settles the Numbers
espresso-machines
How to Froth Milk: A Q Grader's Guide to Café-Quality Foam at Home
accessories
7 Best Espresso Machines of 2026
espresso-machines
Espresso vs. Coffee: A Q Grader Explains the Difference Everyone Gets Wrong
espresso-machines
How to Use a Moka Pot: A Q Grader's Step-by-Step Guide
manual-brewers
About the Reviewer

Clara Bennett, CQI Q Grader, SCA Roaster
B.S. Food Science, UC Davis
Clara Bennett is a Coffee Quality Institute (CQI) licensed Q Grader and SCA-certified roaster with over a decade in specialty coffee — from competition barista to production roaster and green-coffee buyer. She has cupped thousands of coffees to CQI protocol and dialed in espresso on everything from $90 entry machines to commercial three-group setups. She founded Brew Gazette in 2026 to turn cupping-table standards into plain-English buying advice.