How to Froth Milk: A Q Grader's Guide to Café-Quality Foam at Home
CQI Q Grader and SCA roaster Clara Bennett explains how to froth milk seven different ways — steam wand, handheld frother, French press, jar, whisk — plus the temperature window, the milk that foams best, and how to fix bubbly, flat, or collapsing foam.
Updated
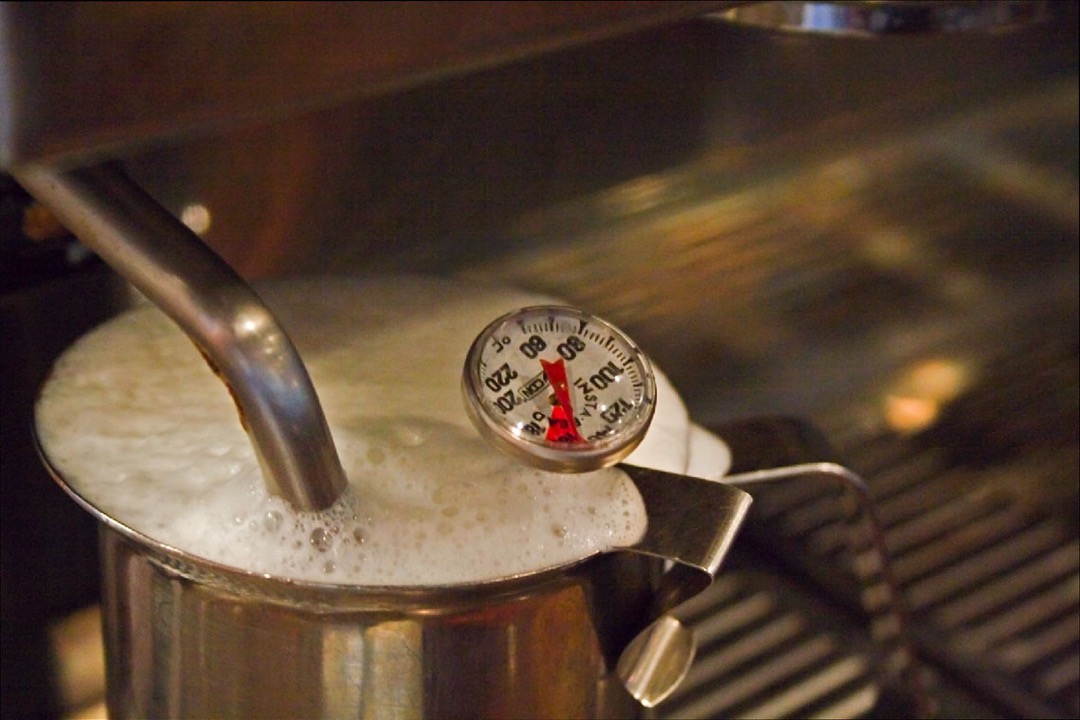
Frothed milk is the single biggest difference between coffee that tastes like it came from a café and coffee that tastes like it came from your kitchen — and it is also the step home brewers give up on fastest. I’ve spent years on both sides of the counter, and I can tell you the frustration is almost never a talent problem. It’s a physics problem that nobody explains. People buy a frother, press the button, get a mug of hot milk with a crown of soap-suds bubbles on top, and conclude their machine is bad.
It usually isn’t. What’s happening is that two entirely separate things need to occur, in order, and most guides describe them as one action. First you have to get air into the milk. Then you have to break that air down into bubbles small enough that they stop reading as foam and start reading as texture. Miss the first and you have hot milk. Miss the second and you have a bubble bath. Get both right and you get the glossy, paint-like liquid that pours into a cup and folds smoothly into the coffee — the stuff baristas call microfoam.
This guide covers all of it: what is actually happening inside the pitcher, the temperature window that matters more than any technique, how to do it with seven different tools including several you already own, which milk to buy, and how to diagnose foam that came out wrong.
What Frothing Milk Actually Does
Milk is roughly 87 percent water, with proteins, fat, and lactose sugar suspended in it. When you introduce air, the proteins — mostly casein and whey — rush to the surface of each new bubble and form a flexible skin around it. That protein skin is the entire structure of your foam. Fat then does something different: it doesn’t build the bubble walls, it coats them, adding richness, that glossy sheen, and a mouthfeel that lingers.
This is why the two halves of the process have proper names in the trade. Aeration, sometimes called stretching, is the phase where you deliberately pull air in and the milk gains volume. Texturing, or rolling, is the phase where you stop adding air and instead whip the milk hard enough to shatter the big bubbles into thousands of tiny ones, folding them evenly through the liquid.
Foam made of large bubbles is unstable — big bubbles merge into bigger bubbles and pop, which is why bad foam separates from the drink within a minute and leaves a dry crust. Microfoam, made of bubbles too small to see individually, is stable, sweet, and pours as one continuous liquid with the milk beneath it. Nearly every frothing failure is an aeration phase that ran too long combined with a texturing phase that never happened at all.
The Temperature Window: 140 to 155°F
Before any technique, understand this, because it constrains everything else.
Aim to finish between 140 and 155°F (60 to 68°C). Two facts make that window non-negotiable. Lactose, milk’s natural sugar, is perceived as sweetest by the palate right in that range, which is why correctly frothed milk tastes noticeably sweeter than milk you simply heated — you haven’t added anything, you’ve just stopped short of destroying the sweetness. And milk’s whey proteins begin to denature and unravel somewhere around 150 to 160°F; once they do, they can no longer hold your bubble walls together, so overheated milk loses its texture at the same moment it loses its flavor. Past roughly 170°F you get the flatly cooked, faintly sulphurous taste of scalded milk, and no espresso underneath will rescue it.
Just as important is where you start. Milk only accepts air while it’s cool. By the time it climbs past about 100°F, aeration has effectively stopped, so every degree you begin above fridge temperature is runway you’ve thrown away. Start with cold milk in a cold pitcher whenever the method supplies its own heat.
No thermometer? Hold the pitcher by its side, not the handle, and stop the moment it becomes uncomfortable to keep holding — that lands almost exactly at the top of the window. A clip-on dial thermometer removes the guesswork for very little money. And if you’re wondering about brew temperature for the coffee itself, that’s a separate target entirely, which our free coffee water temperature calculator works out for your roast, method, and elevation.
Method 1: The Steam Wand (The Gold Standard)
A steam wand injects pressurized steam, which aerates and heats simultaneously. It’s the only method that produces true latte-art-grade microfoam, and it’s the reason a wand is worth prioritizing when shopping for an espresso machine.
- Purge first. Blast the wand for a second into a cloth. Condensed water collects in the wand between uses, and if you don’t clear it you’ll pump watery milk into your pitcher.
- Fill the pitcher one-third to halfway with cold milk. Any fuller and the expanding milk will overflow before you’ve built enough foam.
- Position the tip just below the surface, slightly off-center rather than dead middle. Off-center is what will generate the whirlpool.
- Aerate. Open the steam fully. You want a steady tss-tss — the sound people describe as tearing paper. Each of those sounds is a bite of air. Lower the pitcher gradually to keep the tip at the surface as volume rises. For a latte this phase is short, around three to five seconds; for a cappuccino, roughly twice that.
- Texture. Raise the pitcher so the tip sits properly submerged. The hissing should stop and the milk should start spinning in a visible vortex, pulling the surface bubbles down into the body of the milk and grinding them small. This is the phase people skip, and it is the one that makes microfoam.
- Stop at temperature, then wipe the wand immediately and purge again. Milk bakes onto a hot wand within seconds and is miserable to remove later.
- Swirl and tap. Knock the pitcher once on the counter to pop any surviving large bubbles, then swirl until the surface looks like wet paint. Pour while it’s still moving — frothed milk starts separating the moment it sits still.
Method 2: A Handheld Frother
The battery-powered wand with a little coiled whisk is the highest-value tool in home coffee, and the one I recommend to most people. It costs a fraction of an espresso machine and produces genuinely good foam. Our roundup of the best milk frothers covers the handheld models alongside the automatic jugs.
Heat the milk first — microwave or stovetop, to the 140 to 155°F window — then pour it into a tall, narrow vessel filled no more than halfway. Insert the whisk just below the surface, switch it on, and hold it there for 15 to 20 seconds while the volume rises. Then sink it deeper and hold it slightly off-center for another 10 to 15 seconds; you’ll see the milk begin to spin, which is your texturing phase. Tilt the vessel a little to encourage the vortex. Finish by tapping and swirling as above.
The two mistakes here are running the whisk at the surface the whole time, which gives you nothing but bubbles, and using a wide mug, which lets the milk slosh instead of spin.
Method 3: An Automatic Electric Frother
These are the countertop jugs with a magnetic whisk and a heating base — pour milk in, press a button, walk away. They’re the most convenient option by a distance, and modern ones handle both hot and cold settings, which matters if you drink iced lattes.
Two things to check. Fill only to the marked line: automatic frothers overflow readily because the milk expands more than people expect. And pick one with a removable, dishwasher-safe jug, because milk residue bakes onto the heating element and is genuinely unpleasant to clean by hand. The foam these produce is consistent and good rather than exceptional — slightly airier than a wand, perfectly suited to cappuccinos and everyday lattes.
How to Froth Milk Without a Frother
You don’t need to buy anything. These four methods use what’s already in your kitchen, and the first two are good enough that I use them when travelling.
The French press. The best no-gadget method by some margin, and if you already own one for brewing you own the finest budget frother there is. Warm the milk to temperature, pour it into a clean French press filled no more than a third, and pump the plunger briskly up and down in the lower half of the milk for about 30 seconds. The mesh screen forces the milk through fine holes repeatedly, which is essentially mechanical texturing — the bubbles come out noticeably smaller than a shake or a whisk produces. Rinse it well afterwards, since milk residue in the mesh will taint your next brew; our guide to using a French press covers the cleaning routine.
The jar shake. Fill a screw-top jar no more than a third with cold milk, seal it tightly, and shake hard for 30 to 60 seconds until the volume roughly doubles. Remove the lid — this matters — and microwave for about 30 seconds. The heat stabilizes the foam so it holds instead of collapsing. It’s crude, it works, and it requires no equipment at all.
The whisk. Warm the milk in a saucepan over low heat and whisk briskly and continuously as it heats. Rolling the whisk handle between your palms is faster than beating. You’ll get looser, larger-bubbled foam than the other methods and it takes real effort, but it’s perfectly serviceable for a cappuccino.
The blender. Warmed milk in a jug blender or under an immersion blender for around 20 seconds produces plenty of volume quickly. Leave headroom, hold the lid down, and expect slightly bigger bubbles than the French press gives you. An immersion blender in a tall jug is the better of the two.
Matching Foam to the Drink
“Frothed milk” isn’t one thing, and the difference between drinks is almost entirely how much air you added during the aeration phase.
A latte wants only a small amount of air — a thin layer of microfoam over a body of steamed milk, roughly a centimetre once poured. Aerate briefly and spend most of your time texturing. A flat white wants even less air and even finer texture: barely any stretching, all rolling, resulting in a glossy liquid rather than anything you’d call foam. A cappuccino is the airy one, traditionally equal parts espresso, steamed milk, and a thick, distinct foam cap, so you aerate for roughly twice as long. A macchiato needs only a spoonful of foam dolloped onto the shot, which makes it the most forgiving drink to practise on.
If you’re building any of these without an espresso machine, a stovetop moka pot makes a concentrated brew that stands up to milk far better than drip coffee does — the closest thing to espresso you can get on a hob. It’s worth reading how the two actually differ, which our espresso versus coffee guide breaks down.
Choosing Milk That Actually Froths
The milk matters more than the machine, and this is where most disappointment originates.
Whole dairy milk is the most forgiving and the best tasting. Its protein builds the structure and its fat delivers the gloss, the body, and foam that holds together in the cup. Skim foams to more volume, since there’s no fat interfering with the proteins, but the result is dry and stiff, sits on the drink like a hat instead of blending in, and collapses sooner. Two percent splits the difference sensibly.
Freshness counts. Milk approaching its date foams measurably worse. Ultra-pasteurized milk of any fat level has been heated hard enough that its proteins are already partly denatured, and it never quite textures like fresh pasteurized milk — worth knowing, because a lot of shelf-stable and organic milk is UHT-treated.
For non-dairy, the rule is simple: buy the carton that says barista. Standard oat milk is largely starch and water and gives you weak foam that collapses fast and can curdle on contact with hot, acidic espresso. Barista oat blends add protein, a little fat, and an acidity regulator precisely to solve both problems, and a good one performs close to whole dairy — which is why oat has become the default alternative in cafés. Soy has the strongest protein content of the alternatives and foams well, though it’s the most likely to split in very hot or very acidic coffee. Almond is the weakest performer, thin and quick to dissipate, so a barista version isn’t optional there. Coconut behaves similarly to almond.
One last note on the coffee itself: milk mutes acidity and amplifies body, so beans that taste bright and delicate black can vanish entirely under milk. If your lattes taste washed out, the fix is often the bean rather than the foam — a darker roast or an espresso blend has the chocolate-and-caramel weight to cut through. And whatever you brew, an even grind from a proper burr grinder does more for the finished drink than any milk technique.
Troubleshooting Bad Foam
Big, soapy bubbles. You aerated for too long and never textured. Cut the surface phase short and spend longer with the whisk or wand submerged, building a vortex. A firm tap on the counter plus vigorous swirling will rescue foam that’s only mildly bubbly.
Barely any foam at all. Either the milk was already too warm when you started, or it’s low-protein, old, or ultra-pasteurized. Start colder and check the carton.
The foam collapses within a minute. Usually overheating, which broke down the proteins holding it up. Occasionally it’s a low-fat or non-barista plant milk that never had the structure to begin with. Frothed milk also separates as it stands, so pour immediately and keep the pitcher swirling until you do.
A scalded, boiled taste. You went past 160°F. This one is unfixable after the fact — remake it, and use a thermometer.
The milk curdles in the coffee. Hot, acidic coffee meeting a milk that can’t handle it. This is standard oat and almond milk behaviour, and it’s what barista formulations exist to prevent. With dairy, it points to milk near the end of its life.
Foam in the pitcher, none in the cup. You waited too long to pour. Frothed milk begins separating into foam and liquid the instant it stops moving — swirl continuously and pour while it still looks like wet paint.
Frothing is a genuinely learnable skill with a short curve. Give it a week of daily attempts, change one variable at a time the way you would when dialling in a pour-over, and the moment the milk first spins into that glossy vortex you’ll understand exactly what you were aiming for all along. From there, every cup you make at home stops being a compromise.
Frequently Asked Questions
Is it better to froth cold or hot milk?
What common mistake should be avoided when frothing milk?
How do I froth milk without a frother?
What temperature should frothed milk be?
Which milk froths best, and do oat and almond milk work?
Related Articles
9 Best Milk Frothers of 2026
accessories
How to Use a French Press: A Q Grader's Step-by-Step Guide
manual-brewers
How to Make Pour-Over Coffee: A Q Grader's Step-by-Step Guide
drip-pour-over
7 Best Espresso Machines of 2026
espresso-machines
Best Coffee Beans for Espresso in 2026 (Q Grader Tested)
coffee-beans
About the Reviewer

Clara Bennett, CQI Q Grader, SCA Roaster
B.S. Food Science, UC Davis
Clara Bennett is a Coffee Quality Institute (CQI) licensed Q Grader and SCA-certified roaster with over a decade in specialty coffee — from competition barista to production roaster and green-coffee buyer. She has cupped thousands of coffees to CQI protocol and dialed in espresso on everything from $90 entry machines to commercial three-group setups. She founded Brew Gazette in 2026 to turn cupping-table standards into plain-English buying advice.