How to Make Pour-Over Coffee: A Q Grader's Step-by-Step Guide
CQI Q Grader and SCA roaster Clara Bennett explains how to make pour-over coffee at home — the ratio by weight, grind size, water temperature, the bloom, and the pouring technique that turns a good cup into a great one.
Updated
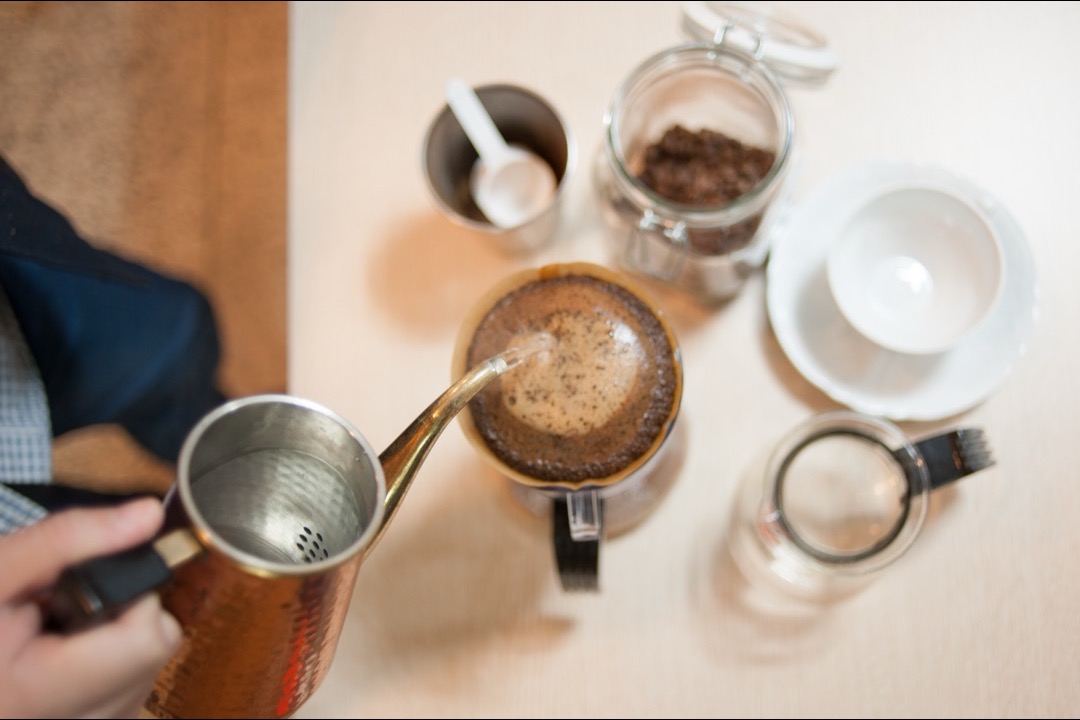
Pour-over is the method that made me fall in love with coffee as a craft rather than just a caffeine delivery system. Long before I sat for my Q Grader exam, I was standing over a cheap ceramic cone in a tiny apartment kitchen, watching water spiral through a bed of grounds and realizing — for the first time — that the same bag of beans could taste like two completely different drinks depending on how I brewed them. That is pour-over’s quiet magic. It is the most transparent brewing method there is: nothing between you, the coffee, and the water. Every choice you make shows up in the cup, which is exactly why it is both the most rewarding way to brew and the one people most often get frustrated by.
The good news is that “getting it right” is not a matter of talent or expensive gear. It comes down to a handful of variables — ratio, grind, water temperature, the bloom, and how you pour — and once you understand what each one does, you can steer the cup toward whatever you like. This is the guide I’d hand a friend who owns a dripper and a bag of good beans but keeps ending up with something thin, sour, or oddly bitter. We’ll walk through the whole process and, more importantly, the reasoning behind each step so you can adjust it to your own taste instead of following a recipe blindly.
What You’ll Need
Pour-over is refreshingly low on equipment, but a few pieces genuinely matter:
- A dripper. The cone-shaped brewer that holds the filter. A single-cone plastic or ceramic V60-style dripper costs very little and is what most people start with. Flat-bottom drippers (Kalita-style) are more forgiving of a sloppy pour, and the classic glass Chemex brews larger batches with a heavier filter for an extra-clean cup. Any of them works — the technique below applies to all.
- A grinder. This is the single most important upgrade you can make. Pour-over demands an even, medium grind, and only a burr grinder delivers that. A quality burr grinder will do more for your cup than any dripper or kettle. If you take one thing from this guide, make it this.
- A scale. Pour-over is a ratio game, and ratios only hold up by weight. An inexpensive gram scale — ideally one with a built-in timer — takes the guesswork out and makes every cup repeatable.
- A kettle. A gooseneck kettle gives you the slow, controlled stream that makes pouring accurate. A regular kettle can work in a pinch, but the narrow gooseneck spout is the one specialty item I’d actually recommend buying.
- Filters. Paper filters made for your specific dripper. Rinse them first (more on that below).
- The coffee itself. Fresh whole bean coffee, ground right before you brew. Pour-over rewards good beans more than any other method — its clarity leaves nowhere for a stale, cheap coffee to hide.
That’s the whole kit. No pods, no pump, no pressure — just water finding its way through coffee under gravity alone.
Step 1: Weigh Everything (The Ratio)
If you change one habit today, make it this: weigh your coffee and your water. Pour-over strength is governed almost entirely by the ratio between the two, and that ratio only stays consistent when you work in grams.
My default starting point is 1:16 — one gram of coffee for every 16 grams of water. For a single large mug, that’s about 30 grams of coffee to 480 grams of water. It lands right in the extraction sweet spot: sweet and full-bodied without tipping into bitterness. If you want to skip the arithmetic entirely, our free coffee-to-water ratio calculator turns any cup size into the exact grams of coffee and water for a range of strengths.
Here’s why scoops betray you. Ground coffee density swings wildly with roast level — a darker, more brittle roast is less dense, so a level scoop of it can weigh up to a third less than the same scoop of a light roast. Measure by volume and your “same recipe” silently drifts in strength every time you open a new bag. Weight eliminates that variable completely, and it’s the foundation everything else builds on.
Step 2: Grind Fresh, and Grind Right
Coffee begins going stale the moment it’s ground — the increased surface area lets aromatics escape and oxidation set in within minutes. That’s why grinding immediately before brewing is non-negotiable for a great cup, and why pre-ground coffee, however convenient, always tastes a step behind.
For pour-over, aim for a medium grind — think coarse sea salt or granulated sugar. That’s finer than a French press grind but much coarser than espresso. The size controls how fast water moves through the bed: finer slows it down and extracts more, coarser speeds it up and extracts less. Just as important as size is consistency, and that’s entirely down to your grinder. Burr grinders produce uniform particles; blade grinders chop randomly into a mix of dust and boulders that over- and under-extract simultaneously, which is why a blade-ground cup never tastes fully clean no matter your technique.
Step 3: Heat the Water to the Right Temperature
Water temperature is a lever, not a fixed rule. Aim for 195 to 205°F (90 to 96°C) — water that’s come off a boil and rested 30 to 45 seconds. Hotter water extracts faster; cooler water more slowly. Use that to your advantage: pull toward the low end for dark roasts to keep bitterness in check, and toward the high end for light roasts, which are dense and need the extra energy to give up their sweetness. You don’t need a variable-temperature kettle to hit this window — boiling water poured into a room-temperature kettle drops into range within a minute. One caveat almost nobody mentions: if you live at altitude, water boils below 212°F, and above about 5,300 feet you physically cannot reach the top of that window at all. Our free coffee water temperature calculator works out your target for this roast and method, tells you the exact temperature water boils at your elevation, and gives you the rest time for the kettle you actually own.
Step 4: Rinse the Filter and Add Coffee
Set your filter in the dripper and pour hot water through it before you add any coffee. This does two things: it rinses away the papery taste that dry filters otherwise impart to the cup, and it preheats your dripper and mug so the brew temperature doesn’t crash the moment water hits the grounds. Discard the rinse water, then add your ground coffee and give the dripper a gentle shake to level the bed flat — an even bed is what lets water pass through uniformly.
Step 5: The Bloom
Start your timer and pour just enough water to saturate all the grounds — about twice the weight of your coffee, so roughly 60 grams for a 30-gram dose. Then wait 30 to 45 seconds.
You’ll watch the coffee bed swell and foam. That bubbling is carbon dioxide escaping — a natural byproduct of roasting that stays trapped in beans for weeks. CO2 repels water, so if you don’t release it first, it pushes water away and creates channels where the stream races through without extracting evenly. Blooming degasses the bed so your main pour saturates every particle uniformly. A big, vigorous bloom is a happy sign your beans are fresh; a flat, lifeless one means they’re past their prime. Skipping this step is the most common reason a technically correct pour-over still tastes hollow.
Step 6: The Main Pour
Now pour the rest of your water in slow, steady stages, keeping the stream in a small spiral from the center outward and back — never letting water pour directly down the sides, where it would bypass the coffee. The goal is to keep the bed evenly saturated and the water level steady, neither flooding it nor letting it run dry between pours.
For a 480-gram total, I pour in two or three additions after the bloom, pausing a few seconds between each to let the level draw down slightly. Your whole brew — from the first bloom pour to the last drip — should finish in about 2:30 to 3:30. That total time is your best diagnostic: too fast means your grind is too coarse (weak, sour cup); too slow and pooling means it’s too fine (bitter, muddy cup). Aim for a flat, even bed of spent grounds at the end, with no deep crater or high-and-dry ring around the edge.
If holding all of that in your head while you pour is the part that keeps going wrong, our free pour over coffee calculator writes the whole thing out for you: every pour, the weight to add, and what the scale should read when you stop, worked out for your dose and your dripper. It also has James Hoffmann’s Ultimate V60 and Tetsu Kasuya’s 4:6 built in, so you can follow either published recipe at whatever size you’re actually brewing rather than the size they demonstrated it at.
Step 7: Taste and Adjust
This is where pour-over becomes a craft. Sip the finished cup and read it like a dial. Sour, thin, or salty means under-extraction — grind finer, use hotter water, or pour more slowly next time. Bitter, harsh, or drying means over-extraction — grind coarser, cool the water slightly, or pour a bit faster. Change only one variable per brew so you can tell what did what. Within a few mornings you’ll have your favorite bag dialed in, and it’s genuinely one of the more satisfying little rituals in a coffee routine. To put words to what you’re tasting, our interactive coffee flavor wheel is a fun way to build your palate.
Two Variables Most Guides Ignore: Water and Freshness
Once your ratio, grind, and pour are dialed in, two overlooked factors separate a good cup from a great one — and almost no recipe mentions them.
The first is your water. Brewed coffee is about 98 percent water, so its mineral content isn’t a footnote, it’s an ingredient. The Specialty Coffee Association’s water standard targets roughly 150 ppm of dissolved solids with a balance of hardness and buffering minerals, because those minerals are what actually grab and carry flavor compounds out of the grounds. Very soft or distilled water tastes flat and hollow no matter how perfect your technique, while very hard, chalky tap water mutes acidity and can leave a dull, flat cup. If your pour-over tastes “off” in a way you can’t pin on ratio or grind, try a batch made with filtered or bottled spring water — it’s often the missing variable, and it’s why the same recipe can taste different in two cities.
The second is roast date. The bloom you saw in Step 5 is carbon dioxide escaping, and beans release it fastest in the first two weeks after roasting. Coffee that’s only a day or two off the roaster degasses so vigorously it can be genuinely hard to brew evenly; coffee that’s four to six weeks past its roast date blooms weakly and tastes muted, having lost much of its aromatic life. The sweet spot for pour-over is roughly four days to three weeks after the roast date printed on the bag — long enough to settle, fresh enough to sing. Buy beans with a visible roast date, not a distant “best by” stamp, and you’ve quietly solved a problem most home brewers never diagnose.
How Pour-Over Compares to Other Methods
Pour-over sits in a specific place in the brewing spectrum, and knowing that helps you decide when to reach for it. Compared to a French press, pour-over gives a cleaner, brighter, more delicate cup — the paper filter traps the oils and fine sediment that a metal French press screen lets through, so you trade the press’s heavy body for clarity and nuance. Compared to an automatic drip coffee maker, pour-over is the manual, hands-on version of the same basic principle (water through a filter bed), giving you control over every variable the machine decides for you — though a good drip machine wins on convenience and batch size. And compared to espresso, it’s a different world entirely: espresso is a concentrated, pressurized shot, while pour-over is a full-length, gently extracted cup that showcases a bean’s subtle character rather than its intensity. If you like your coffee black and want to actually taste where it came from, pour-over is hard to beat.
Once you’ve mastered the hot version, the same fundamentals — ratio, grind, fresh beans — carry straight over to cold brew for summer, and if you take milk, a good milk frother turns your pour-over into a café-style latte without an espresso machine. Curious how the caffeine stacks up against a shot? Our guide to how much caffeine is in espresso breaks down the surprising math. However you take it, the pour-over is where good coffee habits begin — and where a great cup is only ever a few small adjustments away.
Frequently Asked Questions
What is the best coffee-to-water ratio for pour-over?
How hot should the water be for pour-over coffee?
What grind size should I use for pour-over?
What is the bloom and why does it matter?
Why does my pour-over coffee taste bitter or sour?
Related Articles
About the Reviewer

Clara Bennett, CQI Q Grader, SCA Roaster
B.S. Food Science, UC Davis
Clara Bennett is a Coffee Quality Institute (CQI) licensed Q Grader and SCA-certified roaster with over a decade in specialty coffee — from competition barista to production roaster and green-coffee buyer. She has cupped thousands of coffees to CQI protocol and dialed in espresso on everything from $90 entry machines to commercial three-group setups. She founded Brew Gazette in 2026 to turn cupping-table standards into plain-English buying advice.