How to Use a French Press: A Q Grader's Step-by-Step Guide
CQI Q Grader and SCA roaster Clara Bennett breaks down how to use a French press — the ratio by weight, grind size, water temperature by roast, the bloom, steep time, and the plunging technique, plus the extraction science behind every step.
Updated
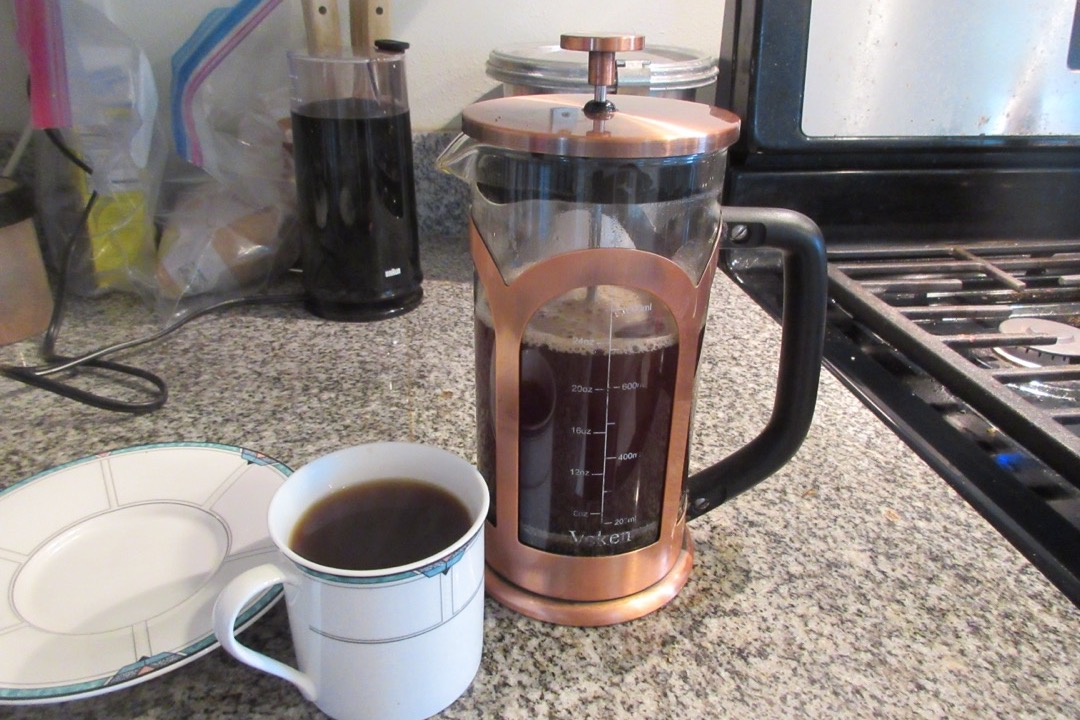
I have brewed a lot of coffee from behind a cupping table. As a Q Grader I taste through dozens of coffees in a typical week, scoring them on acidity, body, sweetness, and balance with a spoon and a slurp — and when I want to actually drink a cup at home with my hands around something warm, the French press is the brewer I trust most to show me what a coffee really is. It hides nothing. There’s no paper filter stripping out the oils, no machine making decisions for you, no specialized skill standing between you and a good cup. It is the most honest brewer in the kitchen.
That honesty cuts both ways. A French press will reward you with a rich, full-bodied, deeply satisfying cup when you get the variables right — and it will hand you a muddy, bitter, gritty disappointment when you don’t. The good news is that there are only a handful of variables, every one of them is controllable, and once you understand why each step matters you can dial the method to your own palate instead of blindly following a recipe. This is the guide I’d give a friend who wants to understand the French press, not just operate it. We’ll cover the ratio, the grind, the water temperature, the bloom, the steep, and the plunge — and a few things the food-blog recipes never mention.
Why the French Press Makes a Different Cup
Before the steps, it helps to understand what makes this brewer distinct, because every technique choice flows from it.
The French press is an immersion brewer: the coffee grounds sit fully submerged in the water for the entire brew, steeping like tea. That’s fundamentally different from a filter method like pour-over or drip, where water passes through a bed of grounds and drains away. Immersion means every particle is in contact with water for the same long stretch of time, which produces an even, heavy extraction and a big, round body.
The second defining feature is the metal mesh filter. Unlike paper, it doesn’t absorb the coffee’s natural oils — it lets them flow straight into your cup. Those oils (and a tiny amount of suspended fine particles) are what give French press coffee its characteristic weight, texture, and richness. It’s a fuller, more tactile cup than anything you’ll pull through paper. The trade-off is a little sediment at the bottom, which is the price of admission for that body. Understanding these two facts — full immersion, no paper — explains everything that follows.
What You Need
The French press is gloriously low-tech, but a few tools genuinely raise your ceiling:
- The press itself. Glass is classic and lets you watch the brew; double-walled stainless steel holds temperature better and survives being knocked off a counter. Either works — our roundup of the best French presses breaks down sizes and materials.
- A burr grinder. This is the single most important piece of gear, and I mean that literally — more on why below. If you buy one thing, make it a burr grinder built for coarse, even grinding.
- A scale. French press strength lives and dies by the ratio, and ratios only hold steady by weight. An inexpensive coffee scale that reads to one gram makes every batch repeatable.
- A kettle. A gooseneck kettle gives you a controlled, gentle pour for the bloom and lets you hit a target temperature, but any kettle works to start.
- Fresh whole-bean coffee. Buy whole beans in a medium to medium-dark roast and grind right before brewing.
A timer (your phone is fine) rounds out the kit. That’s it — no machine, no learning curve, no fuss.
The Coffee-to-Water Ratio
If you take one thing from this guide, take this: weigh your coffee and your water. A French press’s strength is governed almost entirely by the ratio between the two, and that ratio only stays consistent when you work in grams.
My default, and the consensus across serious coffee people, is 1:15 by weight — one gram of coffee for every fifteen grams of water. For a standard 8-cup (1-liter) press that’s roughly 60 grams of coffee to 900 grams of water. Want it bolder? Move toward 1:12 to 1:14. Prefer it more delicate? Stretch to 1:16 or 1:17. Here’s a quick reference by press size at the 1:15 default:
| Press size | Coffee (g) | Water (g) |
|---|---|---|
| 3-cup (350 mL) | ~23 g | ~345 g |
| 4-cup (500 mL) | ~33 g | ~500 g |
| 8-cup (1 L) | ~60 g | ~900 g |
Why insist on weight? Because ground coffee density varies enormously with roast level. A darker roast is more brittle and less dense, so a level tablespoon of dark roast can weigh up to a third less than the same scoop of a light roast. Measure by volume and your “same recipe” silently drifts in strength every time you open a different bag. Weighing eliminates that variable entirely. If you’d rather not do the arithmetic, our free French press coffee ratio calculator does it for you — enter your water volume or press size and it tells you exactly how many grams of coffee to weigh out.
Grind Size: The Most Important Variable
A French press wants a coarse grind — picture coarse sea salt, raw sugar, or breadcrumbs, with no powdery dust mixed in. And the tool you grind with matters more here than in almost any other method, which catches people off guard.
The reason is the long contact time. In a pour-over, water is in touch with the grounds for two or three minutes; in a French press, every particle steeps for four minutes or more. A blade grinder smashes beans into a chaotic mix of fine dust and coarse boulders. Over that long steep, the dust over-extracts into harsh bitterness while the boulders under-extract into thin sourness — so you get both faults in the same cup, plus a load of fines that cloud it and settle as silt. A burr grinder produces uniform particles that all extract at the same rate. That uniformity is the biggest single upgrade most home brewers can make to their French press, which is exactly why I list it above the press itself. If you’re comparing options, our best burr grinders guide covers the range from entry-level to serious.
A handy trick: you can calibrate your grind by feel on the plunge. If the plunger sinks with almost no resistance, your grind is too coarse and you’re under-extracting. If you have to lean your body weight into it, you’ve gone too fine. A slow, smooth, steady press against gentle resistance means you’ve nailed it.
Water Temperature by Roast Level
Most guides tell you to use water at 195–205°F, or “boiling water rested for 30 seconds,” and then stop. That’s fine as far as it goes, but it ignores something a Q Grader thinks about constantly: the right temperature depends on your roast.
The darker a coffee is roasted, the more brittle and permeable its cell structure becomes, so it gives up its soluble compounds — including the bitter ones — faster and more easily. Pour near-boiling water over a dark roast and you’ll blow past the sweet spot into ashy bitterness. A light roast, by contrast, is dense and hard, and needs more thermal energy to extract properly or it’ll taste sour and hollow. So I steer temperature by roast:
| Roast level | Target temperature | Why |
|---|---|---|
| Light | 200–205°F | Dense beans need heat to extract sweetness; cooler water tastes sour and thin |
| Medium | 196–200°F | The balanced middle — full sweetness without harshness |
| Dark | 185–195°F | Brittle, permeable beans over-extract easily; cooler water keeps bitterness in check |
No thermometer? Water boils at 212°F, then drops roughly 2 degrees every 5–10 seconds as it sits. Resting it 30 seconds lands you near 205°F for a light roast; a full minute or more brings you down toward the 190s for a dark roast. A variable-temperature gooseneck kettle removes the guesswork, but the rest-and-pour method works fine once you get a feel for it.
How to Make French Press Coffee — Step by Step
With your ratio, grind, and temperature sorted, the brew itself is quick:
- Preheat the press. Pour some hot water into the empty press, swirl, and dump it. A cold glass or steel vessel steals heat from your brew water and drops your extraction temperature right when it matters most. This ten-second step is one almost every recipe skips.
- Add your weighed, freshly ground coffee. Place the empty press on your scale, tare, and add the grounds — or weigh them separately and pour them in. Give the press a gentle shake to level the bed.
- Bloom (30–45 seconds). Start your timer and pour just enough water to saturate all the grounds — roughly twice the weight of the coffee. The coffee will puff and foam as it releases trapped CO2. Give it a gentle stir to make sure every particle is wet, then wait. (More on what the bloom is telling you below.)
- Add the rest of the water. Pour in the remaining water steadily until you hit your total weight. Pouring with some height and energy helps agitate and saturate the bed evenly.
- Steep for 4 minutes. Set the lid on top with the plunger pulled all the way up — this traps heat without pressing. Leave it alone.
- Break the crust. At the four-minute mark a crust of grounds will have floated to the top. Stir it gently with a spoon; most of the grounds will sink. Skim off any stubborn foam and floating grounds with a spoon if you want a cleaner cup.
- Press slowly. Place the plunger on top and push down with steady, gentle pressure over 15–20 seconds. Slow is the rule — forcing it fast shoves fines through the mesh and stirs up silt. If it fights you hard, your grind is too fine; note it for next time.
- Pour immediately — every drop. This is non-negotiable: decant the entire brew into a carafe or your cups the moment you finish plunging. Coffee left sitting on the grounds keeps extracting, so the brew you leave in the press turns bitter and over-extracted by the second cup. Empty it completely.
That’s the whole method. Stop pouring just before you reach the muddy bottom layer and you’ll keep most of the sediment out of your cup.
The Bloom: A Freshness Test You Get for Free
The bloom deserves its own moment, because it does two jobs and most people only know about one.
The obvious job is even extraction. Freshly roasted coffee is full of carbon dioxide, a byproduct of roasting that slowly escapes over the following weeks. That CO2 is hydrophobic — it repels water — so if you flood fresh grounds all at once, the gas creates a barrier that makes your water channel around pockets of coffee instead of through them, giving you patchy, uneven extraction. Pre-wetting the grounds and pausing lets the gas vent, so the main pour extracts cleanly.
The job nobody mentions: the bloom is a built-in freshness diagnostic. A big, foamy, energetic bloom that rises and bubbles means recently roasted, lively beans — exactly what you want. A flat bloom that barely lifts means the coffee has already off-gassed most of its CO2 and is past its prime, usually more than three or four weeks off roast. So every single morning, your bloom is grading your beans for you. If you’re consistently getting a flat, lifeless bloom, that’s your cue to buy fresher coffee and store it better — an airtight coffee canister kept dark and cool slows the staling considerably.
The Hoffmann Method: When You Want a Cleaner Cup
Sometimes you have a coffee too good and too delicate to muddy — a floral washed Ethiopian, a bright Central American, the kind of single-origin lot whose clarity is the whole point. For those, I switch to a technique popularized by World Barista Champion James Hoffmann that produces a remarkably clean cup without a paper filter.
The method: brew at a slightly higher ratio (around 1:16.5), don’t stir the bloom aggressively, and at the four-minute mark, break the crust and skim off all the foam and floating grounds with two spoons. Then — and this is the key — wait. Leave the press alone for another five to eight minutes. During that rest, the fine particles that cause muddiness sink to the bottom and clump together. Finally, press the plunger down only to just below the surface of the liquid (not all the way to the bottom), and pour gently, leaving the settled sediment behind.
The result is cleaner and more tea-like than a standard French press — closer to a pour-over in clarity but with a touch more body. Use it when you’ve got a light or floral coffee whose nuance you want to protect. Skip it for dark roasts and body-forward blends, where the standard method’s richness is the goal.
Sensory Troubleshooting: What Your Cup Is Telling You
Cupping trains you to read flaws backward — to taste a fault and name its cause. Here’s that framework applied to the French press. Match what you taste:
| What you taste | What it means | The fix |
|---|---|---|
| Bitter, harsh, ashy | Over-extracted | Grind coarser, lower water temp (esp. dark roasts), cap steep at 4 min, pour immediately |
| Sour, thin, hollow | Under-extracted | Grind finer, raise water temp, extend steep to 4.5–5 min, check your ratio isn’t too weak |
| Astringent, drying, mouth-puckering | Fine grind plus extended contact | Grind coarser and never let it sit on the grounds after plunging |
| Muddy, gritty, silty | Too many fines | Switch to a burr grinder, press slowly, replace a worn mesh, stop pouring before the dregs |
| Flat, lifeless, dull | Stale beans or soft water | Buy fresher coffee (watch the bloom); use filtered water with some mineral content |
Notice how often the same three culprits — grind, temperature, and freshness — explain nearly every complaint. Master those and most problems never appear.
A Word on Water
Coffee is around 98% water, so the water you use is a real ingredient, not a footnote — and it’s the variable almost every French press guide ignores entirely. Aim for filtered water with a moderate mineral content, roughly 75 to 150 ppm hardness. Those dissolved minerals (mainly magnesium and calcium) actively help pull flavor out of the coffee. This is why distilled or zero-mineral water makes flat, lifeless coffee — there’s nothing in it to grab flavor compounds. At the other extreme, very hard tap water tastes chalky and scales your kettle. If your tap water tastes good to drink, a simple carbon filter pitcher is usually all you need.
How to Clean a French Press
This is boring and I’m going to insist on it anyway, because a dirty press will quietly ruin every cup you make in it. The metal mesh and the coffee’s oils are the issue: those oils cling to the screen and the glass, and they go rancid. Brew into stale, rancid oils and you’ll taste it — a dull, off, slightly bitter note you can’t grind or temperature your way out of.
After each brew, dump the grounds (compost them — they’re great for soil), then disassemble the plunger fully; the screen unscrews into two or three discs. Rinse and scrub every part, paying attention to the mesh, and let it dry. Once a week or so, give the discs a deeper scrub with a little dish soap and a brush to cut the accumulated oils. It takes two minutes and it’s the difference between a press that makes clean coffee for years and one that slowly turns everything muddy.
The Bottom Line
The French press rewards understanding over equipment. Weigh your coffee and water to a 1:15 ratio so strength stays consistent. Grind coarse and even — which in practice means owning a burr grinder, the upgrade that matters most. Match your water temperature to your roast: hotter for light, cooler for dark. Bloom your fresh grounds and let the bloom tell you how fresh they really are. Steep four minutes, break the crust, press slowly, and pour every last drop immediately so it can’t keep extracting.
Do those things and the French press will give you a cup with more body, richness, and honesty than almost anything you can brew at home — from beans you chose, dialed to your taste, with gear you’ll keep for a decade. It’s the brewer I reach for when I want coffee to taste like coffee, full stop. And once you’ve got the method locked, the natural next steps are exploring which beans sing in immersion, or comparing it head-to-head with its closest cousin in our AeroPress vs French press breakdown. If you’d rather brew it cold, the same press makes an excellent cold brew rig too.
Frequently Asked Questions
Why is my French press coffee bitter?
Why is there sediment or grit in my French press coffee?
Do I need to bloom French press coffee?
What grind size should I use for a French press, and does a burr grinder really matter?
What is the best coffee and roast for a French press?
Does French press coffee have more caffeine than drip coffee?
Related Articles
About the Reviewer

Clara Bennett, CQI Q Grader, SCA Roaster
B.S. Food Science, UC Davis
Clara Bennett is a Coffee Quality Institute (CQI) licensed Q Grader and SCA-certified roaster with over a decade in specialty coffee — from competition barista to production roaster and green-coffee buyer. She has cupped thousands of coffees to CQI protocol and dialed in espresso on everything from $90 entry machines to commercial three-group setups. She founded Brew Gazette in 2026 to turn cupping-table standards into plain-English buying advice.