How to Use a Moka Pot: A Q Grader's Step-by-Step Guide
CQI Q Grader and SCA roaster Clara Bennett explains how to use a moka pot — the grind size, dose, why she starts with hot water, how to read the gurgle, the heat level that prevents bitterness, and the cleaning routine, plus the extraction science behind every step.
Updated
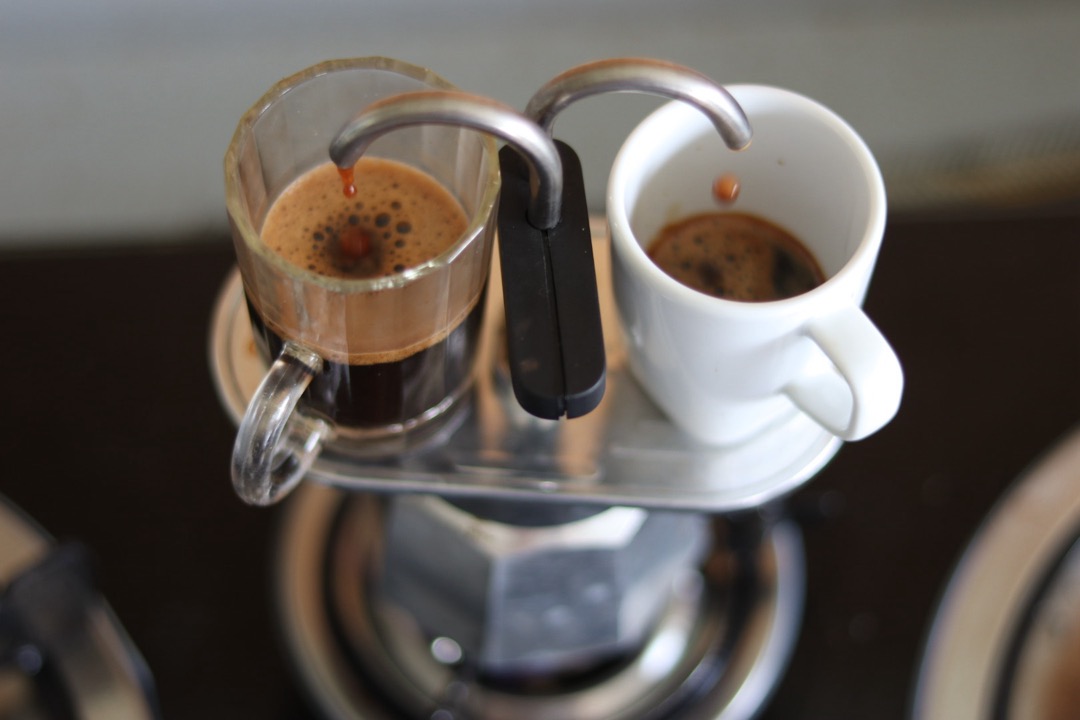
I score coffee for a living. As a Q Grader I spend my weeks at a cupping table, slurping through dozens of coffees and rating them for acidity, body, sweetness, and balance. But the brewer that first made me fall for coffee — years before any certification — was a battered aluminum moka pot on my grandmother’s stove, gurgling and hissing every morning like a small, angry kettle. It is one of the most beloved and most misunderstood devices in the coffee world, and I want to fix the misunderstanding, because a moka pot brewed well makes a cup that punches far above its price.
Here’s the thing almost everyone gets wrong: they treat the moka pot as a poor man’s espresso machine, brew it on a screaming-hot burner, walk away, and come back to something scorched and bitter. Then they blame the pot. But a moka pot is not an espresso machine, and once you understand what it actually is and why each step matters, it becomes one of the most reliable, satisfying, and forgiving brewers you can own. This is the guide I’d hand a friend who wants to understand the moka pot, not just operate it — the grind, the dose, the water, the heat, the gurgle, and the cleanup, with the reasons behind every one.
What a Moka Pot Actually Is (and Isn’t)
Before the method, the single most useful thing I can tell you: a moka pot is not an espresso machine. Understanding why shapes every choice that follows.
A moka pot has three parts stacked vertically — a bottom water chamber, a funnel-shaped coffee basket, and a top collection chamber. You put water in the bottom, ground coffee in the basket, and heat it on the stove. As the water heats, steam pressure builds in the sealed base and pushes the hot water up through the coffee bed and into the top chamber, where your brewed coffee collects. It’s a pressure-driven percolation, and it’s genuinely clever nineteenth-century engineering.
But the pressure it builds is only about 1 to 1.5 bars — barely above atmospheric. Real espresso runs at around 9 bars, roughly nine times as much, and that enormous pressure is what creates true crema and espresso’s syrupy intensity. So a moka pot can’t and won’t make espresso. What it does make is a strong, rich, concentrated coffee that lands between drip and espresso — bolder and heavier than a pour-over, but without crema or a café shot’s punch. It’s its own thing, and it’s delicious. If you want the full comparison of what separates these styles, our espresso vs coffee explainer breaks it down, and if you decide you truly want pressurized espresso, our best espresso machines roundup is where to start. Judge the moka pot as a moka pot and you’ll love it; judge it as a broken espresso machine and you’ll always be disappointed.
What You Need
The moka pot is refreshingly low-tech, but a few things sharpen the result:
- The moka pot itself, sized to how much you drink. Moka pots are sold by “cup” size (a moka “cup” is a tiny 2 oz espresso-style serving, not a mug). A 3-cup pot makes roughly one generous mug; a 6-cup makes two. Always brew a pot near its rated capacity — a half-filled moka pot brews poorly, because the geometry is designed around a full basket and a full base.
- A burr grinder. As with every method, uniform grind is the biggest quality lever you have. A quality burr grinder set to medium-fine beats any blade grinder, and if you also pull espresso, an espresso-capable grinder with fine adjustment near the low end covers moka comfortably.
- Fresh whole-bean coffee. Buy whole beans and grind right before brewing.
- A kettle to pre-heat your water (more on why below), and a towel, because the pot gets hot fast.
That’s the whole kit. No machine, no learning curve, no fuss.
Grind Size: Finer Than Drip, Coarser Than Espresso
If there’s one variable that separates a great moka cup from a bitter or sour one, it’s grind — and the target sits in a specific in-between zone that trips people up.
You want a grind finer than drip coffee but coarser than espresso — think fine table salt, or a hair finer than granulated sugar. Here’s why the middle matters. Grind too coarse and the water blasts through the loose bed too fast to extract properly, leaving you a weak, sour, watery cup. Grind too fine — genuine espresso powder — and it packs into a dense plug that chokes the flow, spikes the internal pressure, pushes extraction into harsh bitterness, and in the worst case makes the safety valve hiss and vent. The sweet spot is medium-fine: fine enough for a strong, full extraction, coarse enough to let water move steadily.
And this is exactly where a burr grinder earns its keep. A burr grinder produces uniform particles that all extract at the same rate; a blade grinder makes a chaotic mix of dust and boulders, so the dust over-extracts into bitterness while the boulders under-extract into sourness — both faults in one cup. Fill the basket loosely and level it off with a finger. Do not tamp the way you would for espresso — a moka pot’s low pressure can’t push cleanly through a compressed puck, and tamping just invites choking and bitterness. A level, untamped basket of medium-fine grounds is the goal.
The Coffee: Dose, Roast, and Beans
The dose is delightfully simple: fill the basket completely and level it off — no more, no less. The basket is engineered to hold the correct amount for that pot’s water chamber, so a full, level basket is the recipe. Don’t underfill (it leaves headroom that lets water channel and stew) and don’t heap and tamp (it chokes). Fill, level, done.
If you want the number anyway — for shopping, for a scale, or just to know what your pot is doing — our free moka pot ratio calculator works it out from your pot size and roast level, and tells you the ratio your pot lands on as a result. It’s worth a look for one reason in particular: a level basket of dark roast weighs about a third less than the same basket of light roast, which is why published moka doses disagree with each other so wildly.
On roast, the moka pot is the natural home of medium to medium-dark roasts and traditional Italian-style blends. The concentrated, low-acid, chocolatey-nutty character of a darker roast suits the brewer’s bold output and stands up beautifully to milk. That said, one of the joys of brewing your own is that a good medium-roast single origin can be revelatory in a moka pot — brighter and more complex than the supermarket espresso blend most people default to. Because the extraction is strong and unforgiving of staleness, buy whole beans and grind fresh; a moka pot exposes flat, stale coffee more than a milky drink does. Our best coffee beans guide is a good starting point, and if you specifically want that classic bold profile, the picks in our best coffee beans for espresso roundup translate perfectly to moka.
Hot Water or Cold? The Real Answer to a Genuine Debate
This is the one question that genuinely divides moka pot drinkers, and most guides just assert their side as fact. Let me give you both, because both have real logic behind them.
The traditional case for cold water is about safety and simplicity. The classic Italian method fills the base with cold water and heats the whole assembled pot from cold. The argument: you assemble the pot at room temperature — no scalding hot base to wrestle a towel around — and the gradual heat-up is gentle and foolproof. It’s how the pot was used in millions of kitchens for a century, and it makes perfectly good coffee.
The modern case for hot water — the one I follow — is about extraction. If you start cold, the entire pot sits over the flame for several minutes while the water climbs to a boil. During that long heat-up, the metal basket and the layer of grounds sitting directly above the hot chamber are slowly roasting — you’re baking the coffee before it ever brews, which adds a stewed, metallic, bitter note. Start with water that’s already near-boiling and the brew begins almost immediately, so the grounds spend far less time being cooked by conducted heat. The cup comes out noticeably cleaner and sweeter. This is the technique James Hoffmann popularized, and the thermal reasoning — that prolonged conductive heat “cooks” the grounds before extraction — is sound.
There’s one nuance nobody mentions: the safety valve is engineered to vent steam, and it’s designed to sit above the water line. Fill the base to just below the valve — that little brass button on the side — whether your water is hot or cold, so the valve keeps its air gap and can do its job.
My verdict: use pre-heated water that’s just off the boil — hot, but not violently boiling — for the cleaner, sweeter cup. The only real cost is that the pot gets scorching fast, so assemble and handle it with a towel. If you value simplicity and a cooler assembly over that last increment of clarity, the traditional cold-start is a legitimate choice, not a mistake — just be ready to keep the heat low and pull the pot promptly once coffee starts flowing.
How to Make Moka Pot Coffee — Step by Step
With grind, dose, and water sorted, the brew itself is quick:
- Boil your water and fill the base to just below the safety valve.
- Fill the basket with medium-fine grounds, level it off with a finger, and seat it in the base. Don’t tamp.
- Assemble the pot — using a towel, since the base is now hot — and screw the top on snugly.
- Set it on low-to-medium heat. This is critical: not high. Low, steady heat gives a slow, even extraction. High heat superheats the water and scorches the coffee.
- Leave the lid open so you can watch. Within a minute or two, coffee will begin flowing into the top chamber — you want a slow, steady stream the color of warm honey, not a violent sputtering jet.
- Watch for the color to lighten. As the stream turns from rich brown to pale, blonde, and foamy, extraction is nearly done.
- Listen for the gurgle (see below) and pull it off the heat the instant it starts sputtering and hissing.
- Cool the base immediately — run the bottom under cold tap water for a few seconds or wrap it in a cold wet towel. This stops extraction dead and prevents the residual heat from scorching the last of the brew.
- Stir the top chamber briefly to blend the stronger first coffee with the weaker later coffee, then pour and drink.
The whole thing takes about five minutes. The two moments that make or break it are the heat level (low) and the timing of the pull (the gurgle).
The Gurgle: When to Pull It Off the Heat
Every moka pot announces its own finish, and learning to read it is the skill that turns a decent brewer into a reliable one.
As the water in the base runs low, the pot stops pushing coffee and starts pushing steam and air up through the grounds — and that produces the famous loud, sputtering gurgle. That sound is your signal that the coffee is done and the pot is now just blasting hot steam through spent grounds, which scorches them and turns the last of your brew bitter and burnt-tasting. So the rule is simple: the moment you hear the first gurgle and see the stream go pale and sputtery, take the pot off the heat. Don’t wait for it to “finish” — the gurgle is the finish.
This is why I keep the heat low and the lid open. On a low flame you get a gentle, controlled brew with plenty of warning, and with the lid up you can see the color lighten before the gurgle even starts. Cooling the base under cold water right after pulling it locks the flavor in place. Miss this window — walk away, leave it on a high flame — and no grind or bean choice will save the cup. Nail it, and the pot is genuinely hard to mess up.
Troubleshooting: What Your Cup Is Telling You
Cupping trains you to taste a flaw and name its cause. Here’s that framework applied to the moka pot — match what you taste:
| What you taste | What it means | The fix |
|---|---|---|
| Bitter, burnt, ashy | Over-extracted / scorched | Lower the heat, pull at the first gurgle, cool the base, grind slightly coarser |
| Sour, weak, thin | Under-extracted | Grind finer, fill the basket fully and level it, make sure you brewed a full pot |
| Metallic, stewed | Grounds baked during a slow cold-water heat-up | Start with hot water; use lower heat so it doesn’t sit and cook |
| Sputtering, coffee everywhere | Grind too fine / basket tamped / heat too high | Coarsen the grind, level don’t tamp, drop the heat |
| Flat, dull, papery | Stale beans or a dirty pot | Buy fresh whole beans; clean the pot and check the gasket |
Notice how often the same two culprits — too much heat and grind — explain nearly every complaint. Control those and most problems never appear.
Aluminum vs Stainless, and Induction
The classic moka pot — the octagonal Bialetti most people picture — is aluminum, which heats fast and evenly and is what the original design was built around. It’s affordable and time-tested. The trade-offs: aluminum isn’t magnetic, so it won’t work on an induction cooktop, and it should be hand-washed and seasoned rather than run through a dishwasher, which strips and pits it.
Stainless steel pots cost more and heat slightly less evenly, but they’re more durable, dishwasher-safe, and many are induction-compatible because steel is magnetic. If your only stove is induction, either buy a stainless induction-rated moka pot or use a small induction interface disk — a magnetic plate that sits between the cooktop and an aluminum pot and lets it heat. Always check the manufacturer’s spec before buying if induction is your burner. For gas or electric coil stoves, a traditional aluminum pot is the reliable, budget-friendly pick.
Cleaning and Seasoning
This part is boring and I’m going to insist on it anyway, because a neglected moka pot quietly ruins every cup.
After each brew: let it cool, then rinse all three parts with hot water only — no soap. This is the one place I break from my usual “scrub everything” rule. A moka pot, especially aluminum, develops a thin patina of coffee oils that seasons the metal and improves the flavor over time; harsh detergent strips that patina and can leave a soapy, metallic taste. Just rinse, wipe, and let every part air-dry completely before reassembling — sealing it damp invites oxidation and musty flavors.
Every so often, check two things. First, the rubber gasket under the top chamber: it hardens and cracks with age, and a worn gasket won’t seal, so the pot loses pressure and brews weakly. Replacement gaskets are cheap and swap in seconds. Second, the safety valve and the filter plate — make sure neither is clogged with grounds, since a blocked valve is a genuine safety issue. A quick poke to clear any trapped grounds is all it takes. Treat the pot well and a good moka pot brews clean coffee for literal decades.
Milk Drinks: Moka Pot “Lattes” and Cappuccino
Because moka coffee is strong and concentrated, it makes a fantastic base for milk drinks — arguably the moka pot’s best trick. It won’t be a true espresso latte (no crema, less intensity), but pour a shot of moka coffee into steamed or frothed milk and you get a rich, café-style drink at home for a fraction of a machine’s cost. A handheld or electric milk frother is all you need to turn a moka pot into a genuine morning-cappuccino setup. Because the coffee is bold and low in acid, it cuts through milk cleanly instead of getting lost the way a weaker drip would. If milk drinks are your main goal, this pairing — a good moka pot plus a frother — is one of the highest-value combinations in all of home coffee.
The Bottom Line
The moka pot rewards understanding over equipment. Grind medium-fine — finer than drip, coarser than espresso — and level the basket without tamping. Fill the basket fully and brew a full pot. Start with hot water so the coffee doesn’t bake, keep the heat low, and watch the stream. The instant it pales and gurgles, pull the pot off and cool the base to stop extraction. Rinse with hot water only, keep the gasket fresh, and the pot will outlast most of your kitchen.
Do those things and the moka pot gives you a cup with more body and boldness than almost anything else at its price — from beans you chose, dialed to your taste, from a device that costs less than a week of café coffee. It’s the brewer that taught me to love coffee, and it still earns a place on my stove. Once you’ve got the method locked, the natural next steps are exploring which beans sing in a moka pot, comparing its caffeine kick in our how much caffeine is in espresso piece, or trying its gentler immersion cousin in our how to use a French press guide.
Frequently Asked Questions
Is moka pot coffee the same as espresso?
Why is my moka pot coffee so bitter?
Should I use hot or cold water in a moka pot?
What grind size is best for a moka pot?
Is an aluminum or stainless steel moka pot better, and can I use one on induction?
Related Articles
How to Use a French Press: A Q Grader's Step-by-Step Guide
manual-brewers
How Much Caffeine Is in Espresso? A Q Grader Settles the Numbers
espresso-machines
How to Make Cold Brew Coffee: A Q Grader's Complete Guide
manual-brewers
7 Best Espresso Machines of 2026
espresso-machines
8 Best Coffee Grinders of 2026
coffee-grinders
About the Reviewer

Clara Bennett, CQI Q Grader, SCA Roaster
B.S. Food Science, UC Davis
Clara Bennett is a Coffee Quality Institute (CQI) licensed Q Grader and SCA-certified roaster with over a decade in specialty coffee — from competition barista to production roaster and green-coffee buyer. She has cupped thousands of coffees to CQI protocol and dialed in espresso on everything from $90 entry machines to commercial three-group setups. She founded Brew Gazette in 2026 to turn cupping-table standards into plain-English buying advice.